Stop and call for qualified help when plumbing water is near electrical equipment, sewage is entering occupied space, gas or burning odors are present, or a repair would require opening pressurized piping.
1. Define What the Replacement Project Must Accomplish
Start with the result the household needs, not a preferred heater size or technology. Longer usable showers, less waiting between showers, lower operating energy, reclaimed space, quieter operation, and easier servicing are different objectives. Rank them before comparing equipment. Identify a leading goal, secondary preferences, and conditions that must not get worse. This gives the contractor a basis for discussing tradeoffs rather than treating every desirable feature as equally important.
Make each priority specific enough to guide a decision. For shower comfort, distinguish maintaining comfort throughout one shower from being ready for the next user. For space, identify what the reclaimed area would actually allow; a smaller-looking appliance is not useful if its required service area prevents that use. For noise, identify the room and time of day where sound matters. For serviceability, describe the present obstacle, such as difficult access around the unit. Lower operating energy should remain a goal to evaluate, not an assumed result of buying newer equipment.
Describe current performance without diagnosing it. Water that starts comfortably hot and then cools during use presents a different complaint from water that takes too long to arrive but remains satisfactory afterward. Note which fixture is affected, whether the pattern is new or longstanding, and whether the problem occurs throughout the home or only in one location. Both patterns can occur together. Use observations from normal use; do not change temperature settings or operate service components to provoke a test.
Also state whether the existing system ever met the household's needs. A recent loss of satisfactory service calls for evaluation of what changed, while a longstanding shortfall may reflect a mismatch between expectations and the existing arrangement. Neither observation establishes that a larger heater is the answer. Chapter 2 develops the demand worksheet, and Chapter 8 addresses fixture-specific delivery delays; this brief only needs to identify which complaints the project must address.
Include foreseeable household changes, but separate committed plans from possibilities. An additional resident, an approved bathroom addition, or a planned change in bathing routine belongs in the brief. An uncertain future renovation should be labeled as such rather than silently becoming a design requirement. State accessibility needs early, including difficulty reaching user controls, limited mobility, or difficulty tolerating a long wait before bathing. The contractor needs these constraints before recommending an arrangement, even though detailed demand and temperature-protection decisions come later.
Identify limits that could rule out an otherwise attractive option. State how long the household can tolerate losing hot water and whether an interruption to all water service would create particular hardship. Clarify whether the existing footprint must be retained, whether relocation is acceptable, and whether wall openings or finish repairs are acceptable. Give an initial available-funds limit and distinguish firm constraints from preferences. Chapter 11 provides the full budget framework; here, the purpose is to avoid developing an option the household cannot realistically undertake.
Define the project boundary around outcomes and affected systems. Separate the heater replacement itself, supporting changes necessary to make it suitable, optional improvements, and unrelated plumbing concerns. Ask whether the proposed replacement alone can address each leading goal. If improving a distant fixture requires work beyond the heater, decide whether that is part of this project or a separate undertaking. Necessary supporting work cannot simply be excluded to preserve a narrow scope, but its need should be explained rather than folded into an unspecified whole-home renovation. Chapter 12 covers proposal terms and added-work approval.
- Gather accessible identification once: photograph the exterior equipment label or copy its visible model number, serial number, capacity, fuel type, and rated input. Leave missing or obscured information for the contractor; do not remove covers or move connected equipment.
- Take a few context photographs from safe standing positions showing the unit, surrounding space, and access doorway. Do not enter cramped or unsafe spaces for a better view. These images support the initial conversation but do not replace a professional site assessment.
- Collect existing installation and service records, especially findings associated with a change in performance. Use records to establish known history; do not assume an unexplained handwritten date confirms equipment age.
- Keep the project brief compact: ranked outcomes, current complaint patterns, conditions that must not worsen, committed household changes, uncertain future plans, and firm space, disruption, and funding constraints. Leave equipment selection open until the contractor evaluates these requirements.
2. Build a Household Hot-Water Demand Profile
A demand profile establishes the household assumptions used to size the replacement: when water is needed, how much each activity uses, and which uses must coexist. Occupant count and daily consumption alone are insufficient. The useful outputs are a timeline of ordinary use, a separate occasional-peak scenario, and clear expectations about which activities may be rescheduled. Use the same worksheet for every contractor so equipment comparisons do not rest on different routines.
Log several representative days, including a workday and a weekend or another day with a different schedule. Record actual start and finish times for showers and tub fills, substantial kitchen hot-water use, and the start times and selected programs for laundry and dishwashing. Mark overlapping events and the gaps between large draws. Continue normal routines rather than deliberately exhausting the heater or running every fixture together.
For showers, separate the initial wait for comfortable water from time spent showering. Note whether the user changes the flow or operates multiple shower outlets. If cooling water forces someone to stop early, record both the actual and intended duration; otherwise, the existing limitation becomes the apparent requirement. Keep fixture-specific wait-time observations available for the delivery assessment in Chapter 8.
Keep ordinary occupancy and guest peaks separate rather than averaging them. For guest periods, record additional occupants, frequency and length of stays, and the likely sequence of bathing and appliance use. A daily average can hide a short, demanding cluster, while treating every guest event as routine can make rarely used capacity dominate the recommendation. Specify whether guests need unrestricted overlap or whether a particular accommodation, such as delaying laundry until after bathing, is acceptable. Do not assume a scheduling compromise unless the household agrees to it.
Use fixture specifications and appliance manuals to fill gaps without disconnecting plumbing. Record showerhead flow ratings and their source, but distinguish rated flow from verified installed flow: pressure, settings, and the number of active outlets affect actual delivery. Mark unavailable information as unknown for the licensed contractor to establish. For appliances, note the program, temperature option, and load size where relevant. Published total water consumption is not necessarily hot-water intake, especially when the appliance uses cold water or heats water internally. A cycle's full duration also does not represent continuous flow; identify staged fills from the manual when that information is available.
Preserve duration, volume, and spacing as distinct inputs. Shower flow multiplied by running time estimates mixed-water volume, not heater-supplied volume. For a tub, record the usual fill level and fill time, along with documented capacity if available; maximum capacity may substantially exceed the normal bathing fill. Longer showers increase volume, overlapping outlets increase simultaneous flow, and closely spaced draws leave less time between demands. These differences remain important even when household size and daily totals are unchanged.
Before converting mixed-water use into heater demand, the professional should establish incoming cold-water temperature, desired delivered temperatures for relevant activities, and the proposed hot-supply temperature. With other conditions equal, colder incoming water requires a greater hot-water share to reach the same mixed temperature. Ask for the source and date of inlet-temperature measurements and a defensible allowance for seasonal conditions at the Niceville property; a warm-weather reading alone does not establish year-round demand. Record these as sizing inputs, not homeowner adjustment instructions. Temperature selection and protection belong in Chapter 9.
Condense the observations into the worksheet below, retaining the event log as supporting detail. Identify the busiest realistic hour and shorter periods of simultaneous use, rather than supplying only daily totals. Keep observations, published values, estimates, and unresolved inputs visibly separate. Chapters 3 and 4 apply this shared demand basis to storage and tankless equipment.
- Scenario: representative dates, ordinary occupancy, guest occupancy and frequency, and known upcoming changes to the routine.
- Event timeline: fixture or appliance, start time, duration or fill time, selected appliance program, overlapping events, and gaps between substantial draws.
- Quantity basis: fixture flow specification, normally active outlets, usual tub fill, relevant appliance intake information, and the source or uncertainty of each value.
- Required service: intended shower lengths, normal bath requirements, activities that must overlap, and specific scheduling compromises accepted for routine or guest use.
- Peak windows: busiest realistic hour, highest simultaneous fixture demand, and any longer sequence of closely spaced uses that extends beyond that hour.
- Professional inputs: verified flows where needed, incoming-temperature basis and seasonal allowance, delivered- and hot-supply-temperature assumptions, and calculated heater demand for each separate scenario.
3. Size Storage Equipment by Delivery and Recovery
A storage heater needs both enough reserve for concentrated use and enough heating capacity to restore that reserve before it is needed again. Use the completed demand worksheet from Chapter 2 as the basis for selection. The existing tank’s gallon designation is a reference point, not evidence that the same size, or a larger one, is the right replacement.
Nominal tank volume describes stored water, not guaranteed usable delivery. As hot water leaves, incoming cold water changes the temperature distribution inside the tank. Stratification, internal mixing, heating during the draw, and control response affect when the outlet temperature falls below what the household needs. Two heaters with equal nominal volumes can therefore provide different service. Neither the full tank volume nor a fixed percentage of it is a reliable universal allowance for usable hot water.
First-hour rating states how much hot water a fully heated storage heater can supply during the first hour under specified test conditions. It reflects both initial storage and heating during that hour. The contractor should compare it with the worksheet’s governing peak hour on a consistent temperature basis. The rating is not a promise of equivalent output in every succeeding hour, nor does it describe performance when the tank starts partly depleted.
First-hour rating is a screening measure, not a complete draw-by-draw prediction. A model can have an adequate hourly rating yet run short during a large draw early in that hour: heat produced later cannot satisfy an immediate need. For a demanding tub fill or similarly concentrated use, ask whether the manufacturer supplies drawdown or delivery data showing how much water remains available before outlet temperature drops below the required threshold. Where those data are unavailable, the recommendation should distinguish a contractor’s estimate from published tested performance.
Recovery rate describes how quickly the heater heats replacement water, commonly in gallons per hour at a stated temperature rise. Compare recovery figures only at matching rises, or have the contractor reconcile them using manufacturer data. Use the inlet and target temperatures already established for the project rather than introducing different assumptions to make one model appear stronger. Heating input alone is not a delivery rating: burner input is not identical to heat transferred into water, and listed electric elements may not operate simultaneously.
Apply recovery to the actual sequence in the worksheet. A smaller tank with faster recovery may meet demand when substantial uses are separated, yet lack the immediate reserve for the largest draw. A larger tank with slower recovery may cover that draw but remain depleted when the next one begins. Ask the contractor to evaluate the tank’s expected condition at the next major use, not merely divide nominal volume by a published recovery rate. Controls, remaining stored heat, and continued water use can make that shortcut misleading.
Compare exact model numbers using first-hour rating, recovery at a common temperature rise, and any available concentrated-draw performance. Check that the cited figures correspond to the proposed operating configuration; selectable-mode behavior is covered in Chapter 5. Keep energy efficiency separate from capacity: an efficiency rating does not establish whether the unit can satisfy the required draw. A useful comparison identifies which model supplies more immediate reserve, which restores service sooner, and whether either advantage matters to this household.
The worksheet already separates routine use from occasional peaks. The storage-sizing decision is whether to provide enough reserve for the occasional event without changing household timing. Extra storage may avoid a wait but can require more space and may increase standby losses, depending on equipment design. Faster recovery may reduce the required reserve but depends on available heating capacity. Compare a routine-demand selection with a peak-demand selection, stating the service gained and any remaining wait between large draws. Do not assume that a larger tank automatically wastes energy or that a smaller tank automatically saves it.
Keep the written sizing explanation focused on the selection’s technical basis. It should answer the following questions using the worksheet and approved temperature assumptions, without recreating the project’s broader proposal requirements:
- Which exact model and operating configuration are recommended, and what published first-hour, recovery, and concentrated-draw data support the choice?
- Can it cover both the governing peak hour and the largest immediate draw, starting from the assumed tank condition?
- What recovery interval is expected after that draw, and will enough reserve remain or be restored for the next scheduled use?
- Which temperature assumptions and performance margins were used, and which conclusions are estimates rather than manufacturer-rated results?
- Why is this reserve-and-recovery balance preferable to the smaller or larger alternative, and what occasional demand or scheduling limitation remains?
4. Determine Whether Tankless Performance Fits the Household
Tankless equipment can sustain a long draw without exhausting stored hot water, but only within its heating and flow limits. Evaluate both ends of its operating range: whether it can heat enough water during the agreed peak demand, and whether it can operate reliably during the household’s smallest draws. A bathroom-count recommendation or advertised maximum flow does not establish either.
Temperature rise is the difference between incoming water temperature and the heater’s outlet target. At a given heating capacity, increasing that rise reduces the flow the unit can heat to the target. An advertised maximum gallons-per-minute rating may apply at a much smaller rise than the household requires. Use the inlet-temperature range and temperature assumptions established in the demand worksheet from Chapter 2 rather than introducing a separate, more favorable sizing basis.
Have the contractor compare the worksheet’s required heater flow with the exact model’s manufacturer performance curve or table at the applicable temperature rise. Apply this comparison to each agreed simultaneous-use scenario, not to household size alone. The selection must satisfy both thermal capacity and any separate maximum flow limit. Water pressure also matters: a thermal performance curve does not establish that the plumbing system can deliver that flow through the heater. The contractor should account for the model’s pressure loss when evaluating usable fixture performance.
Ask how close the required operating point lies to the model’s capacity boundary. A selection that only just meets the calculated load offers little allowance for colder inlet water within the agreed range or uncertainty in fixture demand. Conversely, selecting a larger unit solely for extra peak capacity is not automatically better; its minimum operating limits also need to fit routine use. When demand exceeds capacity, some models limit flow to maintain outlet temperature, while others may deliver water below the target. That model-specific response determines whether an overload feels like weaker showers, cooler water, or both.
Minimum activation flow is the flow through the heater required to start heating. The flow required to keep it operating may be different. Use the worksheet’s heater-flow values, not total mixed fixture flow, to assess this threshold. A low-flow faucet or a shower using substantial cold-water blending may not send enough water through the heater for dependable operation. Brief draws can also end before startup is complete or newly heated water arrives. These are meaningful compatibility limits for households that frequently use a barely opened faucet or short rinses.
Minimum heating output is a separate low-load constraint. Even when flow is sufficient to activate the heater, the heat needed by a small draw may fall below what the unit can continuously supply at its lowest output. Depending on its controls and design, cycling or temperature variation can follow. Compare minimum activation flow, sustained-operation flow, and minimum heating output where the manufacturer provides them; a broad modulation range alone does not prove satisfactory low-flow performance.
Continuous heating is not instant delivery. Startup takes time, and cooled water in the piping must still pass before hot water reaches a fixture. Stop-start use can produce a cooler interval between warmer portions of a draw, and abrupt changes in demand can cause temperature fluctuations while controls respond. Models with buffering or recirculation features may manage particular symptoms, but those features do not by themselves eliminate distribution delays. Evaluate distribution changes separately in Chapter 8.
Multiple units can solve a demonstrated capacity shortfall. A manufacturer-supported staged system can add heating capacity as demand rises; separate units serving different zones prevent those zones from competing for the same heater. Zoning, however, can leave capacity unused in one area while another is overloaded. A dedicated point-of-use unit can remove a defined load from the central heater if it is sized to serve that load independently. This capacity justification is distinct from shortening a remote fixture’s wait.
Additional units bring more connections, controls, maintenance obligations, and utility requirements. Staging must work at low demand as well as at peak flow, and separate zones need their own adequate capacity. Do not assume multiple heaters provide backup: continued service after one fails depends on the piping, controls, and isolation arrangement. Utility feasibility belongs in Chapter 6 before a multi-unit recommendation is treated as viable.
- A tankless proposal should tie the exact model’s performance data to the worksheet’s temperature rise and required heater flow, including pressure-loss constraints.
- Its service envelope should identify supported simultaneous uses, any required scheduling, and the expected response to excess demand.
- It should disclose low-flow and low-load limitations, remaining startup and delivery delays, and what any additional unit or buffering feature actually resolves.
5. Evaluate Heat Pump Water Heater Operation
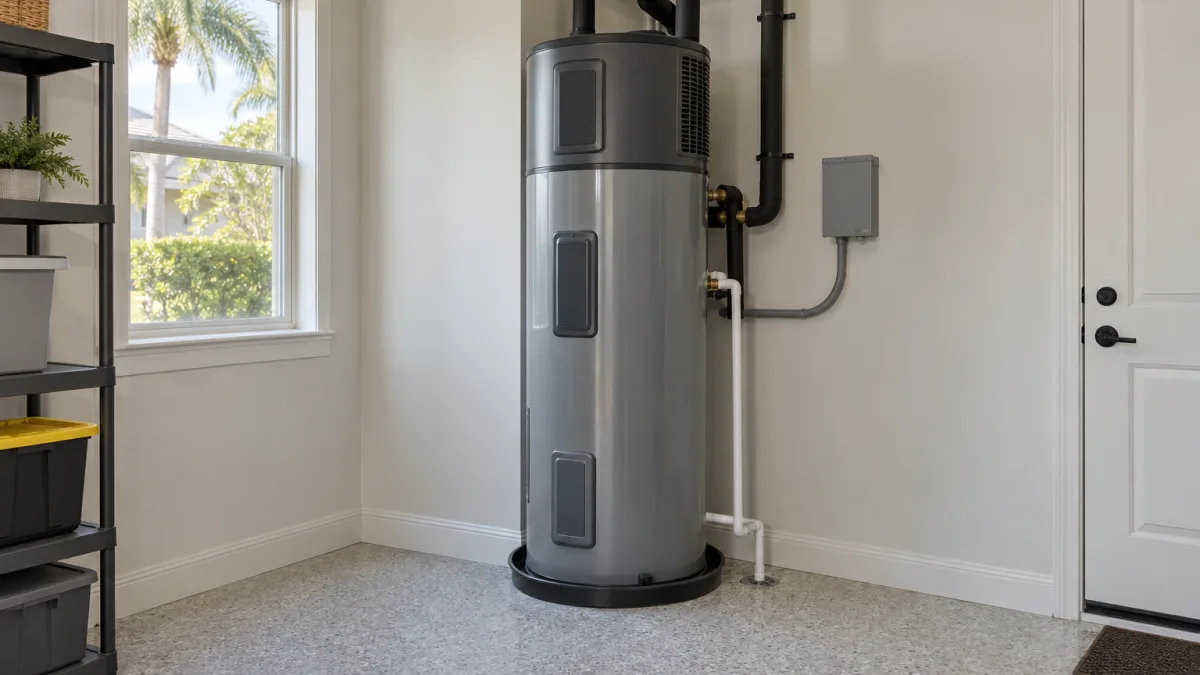
A heat pump water heater uses a fan, compressor, and refrigerant circuit to move heat from surrounding air into stored water. Electricity powers the process, but much of the heat entering the tank comes from the room. Resistance heating instead converts electricity directly into heat at an element. This difference explains both the heat pump’s potential electricity savings and its dependence on room conditions.
Many residential heat pump models include resistance elements that can supplement or replace compressor heating. Their operation depends on the selected mode, tank conditions, ambient temperature, and the manufacturer’s control logic. Some models have limited or no resistance backup, so do not assume every heat pump heater offers the same recovery options. The key comparison is how each proposed model would operate under the demand profile developed in Chapter 2.
Compressor-only mode generally uses less water-heating electricity but often recovers more slowly than modes permitting resistance assistance. After a large draw, another substantial use may have to wait. Check the manual’s definition: a mode labeled “heat pump” or “efficiency” may still allow resistance operation under exceptional or protective conditions. Also distinguish a genuinely selectable compressor-only mode from an automatic mode that merely prioritizes the compressor.
Hybrid or automatic mode selects heat sources according to the controller’s programming. It may preserve hot-water availability by adding resistance heat, but the trigger points and priorities differ among models. Resistance or electric mode, where offered, heats without the compressor and gives up the heat-pump electricity advantage while active. High-demand or boost modes may accelerate recovery through resistance assistance; check whether a boost expires automatically or remains active until changed.
Heavy back-to-back demand can remove stored heat faster than the compressor replaces it. A hybrid model may maintain satisfactory service by using its elements more frequently, while delivering less energy savings than expected. Ask the contractor to apply the existing demand worksheet to the proposed operating mode: would resistance heating be an occasional response or a routine requirement? Recovery figures measured with element assistance should not be presented as compressor-only performance.
Vacation mode typically reduces heating during an absence, but its holding temperature, duration, and restart behavior vary. Compare whether return scheduling is available and whether reheating time suits the household’s needs. Vacation mode is not necessarily an off switch or a complete absence strategy; extended-absence and return-to-service planning belongs in Chapter 16.
A licensed professional should compare the model’s permitted ambient operating range with conditions in the proposed room throughout the year. Niceville’s warm weather alone does not establish suitability: cooler periods, summer heat, and changes in household conditioning can all matter. Being within the allowed range also does not mean output or efficiency remains constant. Ask what happens near the limits, reduced compressor capacity, resistance operation, or suspended heating, and what performance data support the recommendation.
The room must continue supplying heat during operation, not merely start at a favorable temperature. An enclosed space can cool as the heater runs. In conditioned space, the home’s heating system may need to replace extracted heat during heating season; during cooling season, heat removal may offset some cooling demand. An unconditioned space has different thermal interactions and potentially wider temperature swings. The professional’s assessment should account for these dependencies; detailed airflow, ducting, and placement requirements belong in Chapter 7.
Occupants may notice cooler discharge air, moisture removal when water condenses on the cold heat exchanger, and fan or compressor sound. These effects follow water-heating operation rather than household comfort needs. Dehumidification varies with humidity and runtime and should not be treated as dependable humidity control. Cooling may be welcome or uncomfortable, while sound may be noticeable during quiet hours. Published sound values are useful only with their measurement conditions and the proposed room’s relationship to occupied spaces.
Compare controls and model-specific performance alongside efficiency labels. Scheduling may prepare for anticipated use or avoid quiet hours, but a shorter heating window can leave less stored hot water or increase later resistance assistance. Favor controls that make these tradeoffs understandable rather than requiring constant intervention.
- Does the display distinguish the selected mode from the heat source actually operating, and is backup-use history available?
- Do published recovery figures identify operating mode and air and water test temperatures?
- Can schedules change modes, or only allow and restrict heating? How does the unit respond to an unexpected draw outside scheduled hours?
- Are essential controls available locally without internet access, and are temporary overrides clearly distinguished from lasting changes?
- After a power interruption, which mode and schedule resume, and does any learned-demand function need time to adapt again?
6. Match the Equipment to Fuel and Utility Infrastructure
Equipment selection depends on what the property’s utilities can support, not just whether the heater meets hot-water demand. Establish the electrical, fuel-supply, and venting requirements of the exact model before committing to a conversion. For a Niceville property, confirm utility availability at the service address; service on a nearby street does not establish that a connection is available at the house.
For an electric conversion, a licensed electrician should evaluate voltage, nameplate load, required branch circuits, conductor sizing, overcurrent protection, grounding, and disconnect provisions. An existing heater circuit is reusable only if it meets the replacement’s requirements. Service and panel capacity need an appropriate load calculation that includes air conditioning, cooking, clothes drying, vehicle charging, pool equipment, and planned additions. Empty breaker spaces do not prove available electrical capacity; a full panel does not, by itself, prove that the service must be enlarged.
Compare electrical connection requirements separately from energy consumption. Resistance storage equipment commonly uses a dedicated 240-volt circuit. On many two-element tanks, the elements operate nonsimultaneously, so adding their wattages can misrepresent the electrical load; the listed rating governs. Heat pump models vary: some use a 120-volt receptacle supply, while others require a dedicated 240-volt connection. Their lower operating energy does not automatically translate into a smaller circuit, because the connection must support the model’s specified maximum load, including backup elements where fitted. Even a plug-connected model needs verification that the circuit is suitable. Chapter 5 addresses operating-mode tradeoffs.
Whole-house electric tankless equipment generally demands much greater instantaneous power than storage equipment and may require several dedicated circuits. That demand can make panel, service, or utility-side work a deciding constraint even where removing the tank frees useful space. The electrician should assess the proposed heater alongside other household loads. Where service changes are necessary, the electric utility must establish whether its supply equipment can support them and what provider-side work is needed.
For gas equipment, a licensed gas professional should verify natural gas versus propane, the appliance’s factory configuration, and whether any proposed fuel conversion is manufacturer-authorized. The supply assessment should cover input rating, required inlet pressure, piping capacity, and meter or regulator capacity, as applicable. Adequacy depends on other connected appliances as well as the heater: pressure must remain within the appliance’s permitted range under the relevant operating loads. Pipe diameter alone is insufficient because length, fittings, pressure loss, and the supply arrangement affect delivery. For propane, tank vaporization capacity and regulation also matter, not simply how much fuel is stored.
Combustion-air and exhaust arrangements distinguish gas options. An atmospheric heater usually draws combustion air from the room and relies on natural draft through a suitable vent; inadequate air supply or building depressurization can disrupt draft. A power-vented heater uses an electric blower to discharge exhaust but may still draw air from the room. Direct-vent equipment draws combustion air from outdoors and exhausts outdoors through an approved arrangement. Direct vent and power vent are not necessarily mutually exclusive: a direct-vent model may also use a blower. Compare the actual air-intake and exhaust design rather than relying on a product-category label.
Keeping the same fuel does not ensure vent reuse. A replacement may require different vent materials, diameter, pressure rating, routing, termination, or condensate provisions. The professional assessment must account for permitted equivalent length and fittings as well as the manufacturer’s instructions. A condensing heater cannot be connected to an old vent merely because the outlet appears to fit. If the old heater shares a vent with another appliance, removing or replacing it can alter the remaining appliance’s venting; that shared system needs review too.
During a power outage, distinguish stored hot water from continued heating. Electric equipment cannot heat without a suitable power source, though a tank may retain usable hot water temporarily. Gas equipment may require electricity for ignition, controls, blowers, or freeze protection. Some atmospheric models operate without household electricity, but this is model-specific. Water availability also matters: a home dependent on an electrically powered well may lose delivery pressure. Any backup-power solution requires professional evaluation of the heater and necessary supporting equipment.
- Electric utility: verify address-specific service capability and provider-side changes if the electrician identifies a capacity constraint.
- Gas provider: verify whether service reaches the property and whether the proposed connected load requires meter, regulator, or supply changes.
- Propane supplier: coordinate tank supply and delivery capability with the gas professional’s piping and regulation assessment.
- Selection checkpoint: compare which circuits, fuel-supply components, and vents can remain, which must change, and whether continued heating during an outage is actually supported.
7. Choose a Location That Remains Serviceable
Choose a location for the equipment’s full service life, not just its installation day. Compare the existing position with feasible alternatives using the exact proposed model. Keeping the same spot can avoid construction, but an old heater’s footprint does not establish that its replacement will fit, receive adequate airflow, or remain accessible for repairs.
The site survey should account for equipment height and width plus fittings, insulation, duct connections, and any base or drain pan. Trace both the incoming route and eventual removal route: door openings, turns, stairs, thresholds, overhead obstructions, and handling space can rule out a location that looks adequate on a floor plan. Homeowners can point out visible bottlenecks from accessible areas; the contractor should determine whether equipment can pass through them and whether any proposed building alteration is feasible.
Separate three spatial requirements: manufacturer-required clearances, technician working access, and component-removal space. Minimum clearance beside a cabinet is not necessarily enough room to service it. Depending on the model, a storage heater may need overhead space to withdraw an anode, a heat pump unit may need access above or beside its upper assembly, and a tankless unit may need space below for service equipment. Connections and adjacent piping must not block removable covers or the path needed to extract components.
Evaluate access with the room in everyday use. A service face behind a washer or fixed shelving can turn a routine repair into a removal project. Required access should not depend on disconnecting another appliance, and doors must open far enough for the intended work. Include planned cabinetry and storage in the layout. Where a removable building panel is proposed, assess whether it actually provides sufficient reach and component-removal space without disturbing utilities.
For a heat pump water heater, physical fit is only the first test. The contractor should check the selected model’s room-volume and air-exchange requirements with doors in their normal positions. Partitions, stored belongings, and shelving can obstruct an otherwise adequate room. A louvered door is not automatically sufficient; its effective opening and the connected space must support the required airflow. Placement should not depend on occupants remembering to leave a door open.
Where the manufacturer permits ducting, compare the complete arrangement rather than treating a duct connection as a simple cure for a small room. Duct size, equivalent length, fittings, terminations, and service access must meet the model’s instructions. Intake and discharge locations should limit recirculation of cooled discharge air. The professional should also evaluate pressure effects and interactions with nearby combustion equipment. A duct route that crowds service access or requires extensive enclosure changes may make another location preferable. Heat pump operating effects are addressed in Chapter 5.
Support and exposure can eliminate an otherwise convenient location. Professionals should evaluate the filled equipment weight, floor or platform condition, and required attachment; wall-mounted equipment needs a suitable supporting assembly. Review vehicle-impact exposure in garages and water entry from storms or nearby building leaks. Exterior placement requires equipment approved for the actual exposure. Humidity and possible salt exposure may matter at a Niceville property, but the assessment should reflect the specific site, not a blanket assumption about local conditions.
Plan drainage from source to destination. An existing pipe or nearby floor drain is not proof of a suitable route. The contractor should verify its destination, condition, capacity, connection requirements, and accessibility. For heat pump condensate, determine whether gravity drainage is feasible, including the required slope, or whether a suitable pump is necessary. A pump introduces another service point and a possible failure mode; its location and overflow response belong in the placement decision.
A drain pan, where appropriate, provides limited collection rather than protection against every leak. It needs adequate space, a suitable outlet, and a functional discharge path. Ask where water would travel if condensate backed up, the pan overflowed, or a connection leaked outside the pan. Locations above finished rooms or beside moisture-sensitive materials deserve particular scrutiny. Condensate and pan drainage are not substitutes for safety-relief discharge; relief protection and protective controls belong in Chapter 10.
Relocate when the gain is lasting and specific: a workable replacement route, accessible service components, adequate airflow, stronger support, or reduced water-damage exposure. Compare relocation with improving the existing location, such as changing an enclosure or removing an access obstruction. Weigh those gains against added piping, utility routing, penetrations, and restoration. Also flag any increased distance from fixtures for the delivery assessment in Chapter 8. Moving the heater is worthwhile only if the new position resolves more constraints than it creates.
8. Improve Hot-Water Delivery Beyond the Heater
A replacement heater can supply enough hot water yet leave a distant fixture waiting. The distribution decision is whether to retain heat in the existing piping, bring hot water closer through recirculation, or heat water locally. Start with the fixtures where delay interferes with ordinary use; a whole-house circulation loop is not automatically the best answer to one slow sink.
During ordinary use, record the fixture, elapsed time from opening its control until water is usable for the task, and the usual control position. Note whether this was the first draw after several idle hours, whether hot water had recently been used nearby, and whether other fixtures were operating. Do not deliberately increase the temperature or touch unexpectedly hot water to establish an endpoint. Compare first and repeat uses when they naturally occur. A shorter repeat wait suggests retained warmth matters, but observations alone cannot establish the piping layout.
A licensed plumber should evaluate branch length, internal diameter, routing, and fixture flow together. Water in a cooled branch generally must be displaced before newly heated water arrives. Longer runs and larger internal diameters hold more water; indirect routing can make a fixture that appears close to the heater hydraulically distant. Lower fixture flow takes longer to clear the same volume. A larger tank does not remove that volume, and smaller piping is not a universal fix because pressure loss and simultaneous demand also matter.
Professionally installed insulation can reduce heat loss from suitable hot-water supply pipes and recirculation returns. Its strongest benefits are retaining warmth between closely spaced draws and limiting heat loss while a loop operates. Accessible runs may offer useful coverage without opening finished surfaces; concealed gaps can limit the overall benefit. Insulation does not shorten the route, reduce its water volume, or keep an idle branch hot indefinitely. If the main complaint is the first draw after an overnight pause, insulation alone may leave much of the wait unchanged.
Dedicated-return recirculation uses a separate return pipe to move water back toward the heater. It avoids intentionally using the cold-water piping as the return path, but installing that additional pipe can require substantial access and finish restoration. Loop placement matters as much as pump selection: fixtures connected by long side branches still must clear those branches. Compare proposals by the uncirculated distance remaining to each priority fixture, not simply by whether a recirculation pump is included.
Crossover recirculation uses a valve at a selected fixture and the cold-water line as the return path under specified conditions. This can avoid a separate return pipe in a retrofit, but affected cold-water fixtures may initially deliver warmer water. That matters at drinking-water taps and anywhere occupants expect cold water immediately. A crossover on one branch may do little for another branch. Suitability depends on the actual piping layout, heater compatibility, and valve and control design.
Demand activation runs circulation in response to a button, sensor, or other trigger. It limits operation to requested periods, although occupants may need to activate it before using a fixture and wait for the loop to warm. Automatic triggers can also start unnecessary cycles if poorly matched to household activity. Timers offer scheduled readiness but may miss irregular use or operate while the home is empty. Temperature controls stop or permit circulation according to a sensor; alone, they may maintain warm piping when nobody needs hot water. Combining scheduling or demand activation with temperature-based stopping can reduce unnecessary operation. Compare distribution heat loss as well as pump electricity: reducing water sent down the drain does not automatically reduce energy use.
The recirculation design should also address flow when circulation is not intended. Pump-off does not always mean water has stopped moving; natural circulation or unsuitable valve behavior can sustain unwanted flow. Sensor location affects whether the system stops before a distant branch is warm or continues heating piping unnecessarily. These are design and control-selection issues for the installer, not problems to solve by extending pump runtime indiscriminately.
A small point-of-use heater may suit an isolated sink with modest, intermittent demand when a long circulation route would lose heat for little useful service. Compare usable delivery for the task, local space and service needs, and the burden of maintaining another appliance. A cold-fed unit supplies that fixture independently; a hot-fed unit can bridge the initial arrival delay but must be approved for the incoming-water conditions. Storage and instantaneous designs have different delivery limits and utility needs; apply the sizing and infrastructure checks in Chapters 3, 4, and 6 rather than selecting by physical size alone.
- Prioritize the fixtures where shorter waits would materially improve use.
- Compare each option's remaining branch delay, effects on cold-water delivery, and expected operating periods.
- Choose between advance activation and scheduled readiness based on actual routines, including irregular use.
- For one isolated fixture, compare local heating with the access work and recurring heat loss of a longer circulation route.
9. Coordinate Storage Temperature, Delivery Temperature, and Health
A temperature-control design distinguishes three values: water stored in the tank, water supplied to the hot-water distribution piping, and mixed water delivered at a fixture. A master thermostatic mixing valve can blend hot and cold water before distribution; a fixture control may blend it again where someone bathes or washes. These temperatures serve different purposes, so choosing the heater’s thermostat setting alone does not establish safe delivery.
Storage temperature influences conditions for microbial growth, while delivery temperature directly affects scald exposure. Hotter water can cause injury more quickly. Yet simply lowering storage temperature is not a complete health strategy: warm water and stagnation can support organisms such as Legionella. Higher storage temperatures may be part of microbial-risk management, but they do not ensure that every branch reaches the same temperature, remove biofilm, or resolve stagnation. Neither a cool faucet nor a hot tank proves that the whole system is protected.
The licensed plumbing professional should reconcile applicable public-health guidance, equipment instructions, and household circumstances rather than recommend one number as universally safe. Discuss residents’ susceptibility to infection separately from their ability to recognize and escape excessively hot water. A medically vulnerable resident may warrant input from their healthcare team alongside plumbing expertise. Identify infrequently used outlets and extended vacancies as design considerations; absence and return-to-service procedures belong in Chapter 16.
A master thermostatic mixing valve regulates the water entering downstream hot-water piping. It allows storage and distribution temperatures to differ, but its performance depends on its intended application, permitted temperature range, minimum flow, and supply conditions. Ask whether the selected valve can regulate during both small draws and simultaneous use, and what its documented response is if the cold-water supply is interrupted. Do not assume every valve has the same protective behavior. Water mixed down at the heater also means downstream piping operates at temperatures different from the tank.
Fixture-level controls serve a different purpose. A pressure-balancing shower valve primarily compensates for changes in relative hot- and cold-water supply pressure; it does not maintain a fixed temperature when supply temperatures change. A thermostatic control responds to mixed-water temperature. A handle limit stop restricts handle travel but does not independently regulate temperature. Some assemblies combine functions. Selection should establish both the required temperature protection and the response to changing supply conditions, not merely whether a product is described as a mixing valve. A master valve does not replace required fixture protection, and a protected shower does not protect an adjacent sink or tub.
Children, older adults, and people with reduced sensation or mobility may have less ability to detect excessive heat or move away from it. Evaluate protection outlet by outlet, especially where bathing involves assistance or prolonged contact with water. Controls should be understandable and reachable before entering the stream. A comfortable handle position is not evidence of a reliable temperature limit, and caregiver checks should supplement rather than replace protective controls.
Report abrupt temperature increases during ordinary use, an unusually narrow comfortable handle range, or persistent differences between bathrooms. Note the fixture and other water uses occurring at the time. Do not deliberately reproduce a suspected scald hazard, test hot water against skin, or ask a vulnerable resident to demonstrate the problem.
Raising storage temperature can increase the amount of mixed water available at a lower delivery temperature, but it also increases the consequences of failed or unsuitable temperature protection and may increase standby heat loss. It does not automatically correct inadequate recovery. Capacity should be selected using the demand and sizing work in Chapters 2 and 3, not rescued afterward by an unplanned thermostat increase.
Use a concise temperature-control plan to connect these decisions. A displayed setpoint is a control target, not a measurement of every tank layer or outlet. Cycling, stratification, distribution losses, and draw conditions can all produce differences. The plan should establish the following criteria for the completion checks in Chapter 14.
- Approved storage setting, distribution target, and fixture delivery limits or targets, with the applicable guidance and equipment instructions supporting them.
- Locations and intended functions of master and fixture-level controls, including outlets needing additional protection for vulnerable users.
- Who may adjust each control; any expressly permitted user-level settings should be distinguished from mixing-valve adjustments, concealed limits, and service settings reserved for licensed professionals.
- Conditions for professional temperature verification, including representative low-flow and simultaneous-use conditions where relevant, plus changes in occupancy, vulnerability, or equipment that require review before settings change.
10. Specify Water-Side Compatibility and Protective Components
Water-side compatibility depends on the complete connection arrangement, not simply whether a new heater fits the existing pipes. The licensed plumber should evaluate pipe materials, condition, pressure conditions, and protective components together. Retaining an existing fitting or device should depend on its suitability for the replacement equipment, not merely the absence of a visible leak.
Copper, galvanized steel, CPVC, and PEX require different joining methods and have different temperature, support, and connection requirements. The review should establish the material and size of the hot- and cold-water piping, identify deterioration near the connection points, and resolve uncertain transitions that affect the work. Homeowners can report accessible pipe markings, staining, corrosion, or distorted plastic without disturbing connections.
A transition must be suitable as an assembly. Dissimilar metals can create corrosion concerns; plastic systems may require a particular connection arrangement or separation from hot surfaces. Factory-installed nipples, dielectric components, flexible connectors, seals, and transition fittings must work together under the heater and piping manufacturers’ instructions. Potable-water suitability, temperature and pressure ratings, connector length, routing, and support matter more than ease of attachment. An added dielectric fitting is not automatically necessary or sufficient, and existing connectors should not be presumed reusable.
Use available water-quality information to resolve specific equipment and material questions. Utility reports provide background but may not establish conditions at an individual heater; private-source water needs information relevant to that source. Compare applicable manufacturer limits with available results and identify any targeted testing needed. Hardness can promote scale on heat-transfer surfaces, while chloride concentration, pH, and other chemistry can affect corrosion. These concerns call for different responses rather than a generic judgment that the water is “bad.”
Existing treatment equipment also matters because it changes the water reaching the heater. The compatibility decision should establish whether that incoming water meets the proposed model’s published requirements and whether it affects material selection, service needs, or warranty terms. Neither a blanket treatment recommendation nor a promise that treatment prevents all failures is a substitute for this comparison. Model-specific service planning belongs in Chapter 15.
Thermal expansion requires its own pressure review. Heated water expands; a check valve, backflow preventer, or certain pressure-reducing arrangements can prevent it from moving back toward the supply, creating a closed system. The plumber should determine whether expansion control is required and whether an existing device remains adequate. New isolation or automatic shutoff arrangements must also be evaluated for their effect on the volume of water enclosed with the heater.
An expansion tank is selected by required acceptance capacity, not connection size alone. Relevant conditions include stored water volume, operating temperatures, supply pressure, and allowable system pressure. Its pressure rating, support, location, condition, and precharge relationship to system pressure require professional evaluation. A pressure-reducing valve does not itself absorb expansion. A temperature-and-pressure relief valve provides emergency protection, not routine expansion control. Recurring relief discharge needs investigation; the outlet must never be capped or blocked.
Storage equipment needs temperature-and-pressure relief protection with ratings and discharge capacity appropriate to the heater; other equipment needs the relief protection specified for its design. The installation plan must establish valve placement and an unobstructed discharge route under manufacturer instructions and applicable requirements. There must be no intervening shutoff between the heater and its required relief protection. Discharge piping must not be capped, improperly reduced, or routed where potentially scalding water endangers occupants. Material, slope, termination, and any required air gap need professional specification. A pan drain or condensate connection cannot be assumed suitable for relief discharge.
Accessible isolation valves and approved removable connections can simplify component service and limit water interruptions. Their placement must preserve relief and expansion protection. Model-appropriate maintenance ports, particularly tankless service assemblies for professional flushing, need tool clearance and secure closures; they are not household taps. Connections should remain reachable without moving the heater or straining adjacent piping.
Leak sensors are useful where leakage could remain unnoticed or damage finishes. Automatic shutoff adds intervention, but effectiveness depends on detection coverage, valve location, power, and communications. A local audible alarm and a remote notification serve different response needs, especially during seasonal absence. Closing the supply cannot remove water already stored in a leaking tank. The installer should establish whether coordinated heater shutdown is required or provided. Neither detection nor shutoff replaces compatible connections, expansion control, relief protection, or the containment provisions in Chapter 7.
- Does each retained transition have identifiable materials and ratings compatible with the new equipment?
- Will service isolation or automatic shutoff leave heated water without adequate expansion or relief protection?
- Can maintenance connections be reached, and will leak detection still provide useful protection if internet access or power is lost?
11. Compare Lifetime Cost Rather Than Purchase Price
Compare systems that meet the same demand worksheet and delivery goals. Then separate two questions: how much cash must be available to complete the project, and what will each option cost over a common ownership period? A low purchase price can conceal substantial installation costs; a low projected energy bill does not necessarily justify a premium within the years you expect to own the home.
Build the upfront budget from equipment, installation labor, removal and disposal, required protective components, electrical or gas utility changes, venting, condensate provisions, relocation, and finish restoration. Include applicable permit and inspection costs established for the project, plus any utility connection charges. Carry forward the feasibility findings from Chapters 6, 10 rather than assuming existing infrastructure is reusable. Separate required work from optional improvements and unresolved allowances. Keep an owner contingency for identified uncertainties, without counting the same allowance twice.
Show the cash required before incentives arrive, not just the advertised net price. Include financing fees and interest when comparing financed options, while avoiding double-counting principal already included in installed cost. For ownership cost, add purchased energy, ongoing professional service, and supported repair or replacement scenarios. Use one analysis period for all options. If it extends beyond a plausible equipment life, show replacement uncertainty explicitly rather than assuming every unit lasts through the period. Any remaining equipment value at the end should also be an explicit assumption, not an assured resale benefit.
Use the Chapter 2 demand worksheet as the common basis for energy estimates. Request annual purchased energy by fuel and unit, with the proposed operating assumptions and included accessories identified. Estimates should account for the relevant operating modes and distribution features established in Chapters 5 and 8; there is no need to rebuild those design decisions here. A label’s annual dollar estimate should not simply be scaled by household size.
For the Niceville property, verify rates with the utility actually serving the address. Use a recent bill together with the current applicable tariff to identify usage-based charges, adjustments, and taxes where applicable. Distinguish those from fixed customer charges: multiply projected energy use by applicable usage rates, then add only fixed charges that differ between options. Removing a gas water heater does not eliminate the gas customer charge if other appliances keep the account active. A new fuel account may add one. Time-varying rates require an estimate of when energy will be purchased, not merely an annual total.
Uniform Energy Factor, or UEF, expresses efficiency under standardized testing. Compare it within the appropriate draw-pattern category; values across categories are not directly interchangeable. UEF does not measure capacity or guarantee installed performance. EnergyGuide information reports standardized consumption and cost estimates using stated assumptions, not your utility tariff or household schedule. Ask which material differences between test conditions and the proposed installation are reflected in the energy estimate. Avoid claiming whole-house cooling or dehumidification savings unless a separate, defensible analysis supports them.
Low occupancy can reduce the amount of energy available to save, weakening the financial return on premium equipment even when its efficiency is better. Evaluate frequent guest periods using their actual share of the year, with the operating assumptions already established for peak demand. For a short expected ownership period, compare cumulative costs through the likely sale date. Do not assume a buyer will repay an unrecovered premium. Quieter operation, reclaimed space, or improved convenience may still justify spending more, but list them as separate benefits rather than energy savings.
Evaluate warranty value alongside service access. Tank or heat-exchanger coverage, other parts, and labor may have different terms. Check registration and maintenance conditions, transferability, and exclusions for diagnostics, shipping, travel, or replacement installation. Ask available service providers about support for the exact model, warranty authorization, and parts sourcing. A covered failure may still produce substantial out-of-pocket expense or a prolonged outage; warranty length alone does not establish lower ownership cost.
Verify incentives through the current program administrator or official tax guidance. Check exact-model eligibility, property and purchaser requirements, qualifying dates, application deadlines, funding availability, and rules for combining benefits. Tax credits, reimbursements, and point-of-sale discounts have different timing and eligibility constraints. Keep unconfirmed benefits out of the base budget and compare alternatives under less favorable assumptions before committing.
- Build low, base, and high ownership-cost cases by varying demand, energy rates, service costs, and supported repair or replacement assumptions. Identify which changes reverse the ranking.
- Show incentives separately, including when funds would become available. Retain a no-incentive case if approval or personal tax eligibility remains uncertain.
- Calculate simple payback as the net upfront premium divided by positive annual operating savings, including service differences. If savings are zero or negative, there is no simple payback.
- Treat simple payback as a screening tool: it omits financing, major replacements, and the time value of money. For discounted comparisons, use consistent inflation and discount-rate assumptions.
- Choose a premium only if its benefits justify both the ownership-cost uncertainty and the immediate effect on funds reserved for other necessary property work.
12. Request Proposals That Can Be Compared Fairly
Give each bidder the same project brief, demand worksheet, and requested scope. Ask for a base proposal with optional improvements priced separately, and require a list of departures and unresolved conditions. Compare what each contractor commits to deliver, not just the totals. If an essential item is missing, ask the bidder to price it or explicitly exclude it before you compare offers.
Require the manufacturer and complete model number, including configuration suffixes, plus identifiers for separately supplied components. Attach manufacturer specifications for the exact selection. Reference the approved demand, sizing, location, and temperature plans rather than reopening those decisions in the proposal. Any contractor recommending a different design should identify the changed assumption and its scope and price consequences.
Use a trade-responsibility schedule covering plumbing, electrical, gas, venting, carpentry, and finish restoration. For each task, identify who supplies materials, performs the work, and coordinates dependencies. Include utility modifications, supports, access openings, exterior sealing, and old-equipment removal. Distinguish closing an opening from restoring texture, paint, or other finishes; state the promised finish standard and any limits on matching existing surfaces. Work designated “by owner” should identify the separate licensed contractor the homeowner must retain, not imply that the homeowner will perform it.
For the specific Niceville property, establish who verifies the property jurisdiction, applicable permitting authority, and installation requirements. Assign permit applications, fees, inspection scheduling, and correction work. Clarify whether required corrections within the agreed scope are included and how genuinely additional work is handled. If a bidder says no permit is needed, request the basis and verify it with the applicable authority; a mailing address or statement about customary practice is not sufficient.
Check licensing against the legal business name on the contract through the relevant official licensing authority, including current status and whether the credential covers the assigned work. Obtain evidence of applicable liability insurance and workers’ compensation coverage or a documented exemption, as appropriate, and confirm it with the issuing agent or insurer. Identify subcontracted trades, who verifies their credentials, and whether the prime contractor remains contractually responsible for their work, corrections, and callbacks. Marketing badges and review scores do not replace these checks.
Read exclusions, allowances, and concealed-condition terms together. Each allowance should identify its assumed scope or quantity, the basis for final charges, any markup, and treatment of unused amounts. Require the contractor to distinguish conditions already observed from those that cannot reasonably be evaluated before access. Concealed-condition provisions should establish documentation, notice, a revised scope and price, and authorization before additional work. Define responsibility for making the site safe during a pause and disclose any associated charges.
Limit substitution rights to changes you approve after receiving the replacement specifications and effects on performance, fit, utilities, service access, warranty, price, and schedule. Every change order should identify added and removed work, credits as well as charges, and the person authorized to approve it. Establish a written approval method; an informal site conversation should not silently expand the contract.
Tie payment milestones to identifiable deliverables, with amounts and due dates stated. Clarify what constitutes completion, how unresolved items affect the final balance under the contract and applicable law, and what happens if equipment delivery or required approvals are delayed. Separate manufacturer warranty coverage from workmanship terms. State the workmanship period, remedy, exclusions, claim procedure, and responsibility for diagnostic charges, labor, travel, and subcontractor callbacks.
- Performance schedule: list storage volume, first-hour rating, and relevant recovery data for storage equipment; rated flow at the design temperature rise for tankless equipment; and applicable efficiency ratings. Record the referenced inlet and delivery temperatures, demand scenario, and operating mode, including any assumed backup operation. Use the earlier sizing chapters to evaluate these values.
- Accessory schedule: identify proposed mixing controls, expansion-control equipment, pan and drainage provisions, service valves, condensate provisions, recirculation equipment, and leak protection where applicable. Mark each as new, reused subject to professional evaluation, optional, or excluded. State who pays if a proposed reused component proves unsuitable.
- Closeout deliverables: assign a provider and delivery date for final equipment identification, applicable permit and inspection closure records, startup and commissioning results, warranty and registration information, operating instructions, and installation and service contacts. Contract for the demonstrations and acceptance criteria reviewed in Chapter 14 without duplicating that inspection checklist here.
- Comparison rule: resolve unpriced essentials before selecting a bidder. Keep genuine design alternatives separate, and carry disclosed allowances and exclusions into the lifetime-cost comparison in Chapter 11 rather than treating the base contract total as the complete project cost.
13. Plan the Installation Window and Household Disruption
Schedule around the return of usable service, not just the delivery or installation appointment. The outage can outlast the physical equipment swap because utility work, inspections, startup, and initial heating may remain. Identify household needs that cannot easily shift, bathing assistance, infant care, or water-dependent routines, and choose a window with a workable fallback if completion slips.
Before a working heater is removed, the contractor should have the specified replacement received and checked for damage, with its dimensions and connection locations verified against the planned installation space and transport route. This is a final readiness check, not a new location study. Job-specific fittings, vent components, electrical materials, drainage materials, and accessories also need to be available. An expected shipment is not installation readiness. If the old heater is unsafe to operate, the contractor must establish safe isolation rather than keep it running while waiting for parts.
Use the responsibilities and approval arrangements established in Chapter 12 to build the work sequence. Utility modifications and placement preparation that can safely happen while the existing heater remains in service should be considered first. After professional isolation and removal, any remaining support or access work must precede placement and connection of the new equipment. Required inspection hold points belong between the relevant stages, not simply at the end. Confirm that prerequisite approvals are in place and that dependent trades have actual appointments; a crew arriving before its prerequisite work is complete may only extend the outage.
Prepare the agreed work route by moving loose belongings, laundry, and vehicles, not connected equipment. Tell the contractor about fragile flooring, narrow turns, low shelves, and any route that doubles as the household’s only practical exit. Arrange floor and doorway protection before removal begins, and leave door removal or structural access work to the responsible professionals. Keep children and pets in a separate area with a route outdoors that avoids the work zone. Protective coverings, tools, and staged equipment must not block household escape routes.
Ask the contractor to distinguish the hot-water outage from a whole-house water shutdown and from electrical or gas interruptions affecting other appliances. Cold-water service may be restorable while the unfinished heater remains safely isolated, but that depends on the work. Establish whether toilets, faucets, laundry, and cooking appliances will be usable during each stage. Complete essential bathing and water-dependent chores before shutdown and set aside drinking water for the expected interruption.
Get an estimated usable-hot-water window as well as the expected installation duration. A storage heater still needs initial heating after proper filling and startup; other equipment also needs its professional startup checks before use. Schedule room for the acceptance checks in Chapter 14 rather than treating them as something to do after the crew leaves. Know when the contractor will update the restoration estimate and who can be reached if service remains unavailable after normal hours.
Keep draining, disconnection, removal, transport, and disposal with qualified professionals. Hot stored water can cause burns, while residual water and sediment complicate lifting. Stairs, attic access, tight landings, or unusually heavy equipment may require additional personnel and handling equipment booked in advance. The removal plan should also account for containing residual water along the route and any materials needing special handling. Do not drain the tank or help move equipment to keep the appointment on schedule.
- Unexpected site conditions: Have the contractor pause the affected stage, secure the area, and explain the schedule impact while using the change process already agreed in Chapter 12. Avoid letting a partly dismantled system become pressure to rush a decision.
- Unavailable inspector: Establish which work may proceed and whether service must remain off pending inspection. An anticipated inspection date is not permission to operate.
- Incomplete installation: Before the crew leaves, affected utilities must be safely isolated, equipment secured, and access restricted as needed. Ask whether cold water can be restored independently. Do not accept bypassed protections or improvised temporary connections.
- Extended outage: Arrange an alternate bathing location or lodging if necessary. Temporary hot-water equipment is an option only when professionally selected and installed with applicable approvals, not an assumed same-day fallback.
- Schedule slippage: Set an update time early enough to make household arrangements before evening. The update should identify current service availability, the next confirmed attendance, and the remaining dependency preventing restoration.
14. Verify the Finished System Before Closing the Project
Commissioning should establish whether the installed system meets the accepted proposal, demand worksheet, and temperature-control plan, not merely whether one faucet becomes warm. Use those existing criteria for a final checklist marked pass, fail, or deferred. A deferred check is not a pass: identify why it remains incomplete, who will complete it, and what evidence will resolve it.
Request a dated startup record identifying the installed model and serial number, responsible professionals, applicable manufacturer checks, measured results, and final settings. Keep inspection status distinct from commissioning results; approval does not by itself demonstrate agreed hot-water performance. Use the closeout requirements established in Chapter 12 rather than creating a new set at the end of the job.
The installer should conduct the tests below. Homeowners can observe from an accessible position and record results without opening covers, approaching exposed energized parts, or manipulating service components. Judge each result against the approved criterion or applicable manufacturer requirement, not an unexplained statement that the system is “working.”
- Equipment startup , Pass when the model-specific startup procedure is complete and exceptions are resolved. For electric equipment, the record should include applicable supply, circuit, grounding, and operating checks by the licensed electrician. For gas equipment, it should include fuel compatibility, supply-pressure and leak checks, combustion-air and vent verification, and combustion measurements or draft and spillage checks where applicable. Missing safety verification is not a minor paperwork item.
- Operating configuration , Confirm that the tested settings are the approved everyday settings. For heat pump equipment, record the selected mode and verification of compressor, backup heating, airflow, and condensate functions as applicable. For tankless equipment, verify startup and stable operation at the relevant flows. Storage equipment should complete its required initial heating cycle before delivery testing. A temporary high-output setting cannot silently replace the agreed configuration.
- Agreed demand test , Have the contractor reproduce the demand worksheet’s selected acceptance scenario. Record starting conditions, fixtures operating together, draw durations, measured delivery, and any specified recovery interval. Pass only if service meets the agreed criteria throughout the test. Record arrival time separately from temperature loss during use. Reducing fixture flow, shortening draws, or removing an overlapping use changes the test and requires explicit resolution rather than a pass.
- Test limitations , Identify conditions the visit cannot reproduce, such as a different seasonal inlet temperature or an extended demand sequence. Distinguish performance supported by the approved sizing analysis from performance demonstrated on site. If a required field test cannot be completed, mark it deferred with a follow-up date; do not describe it as verified.
- Temperature and mixing controls , Have the professional record delivered temperatures at the locations and flow conditions specified in the Chapter 9 temperature plan. Compare measurements with approved limits, not just the heater display. Verify central mixing and fixture-level protective controls separately where included. Out-of-plan temperatures or unstable mixing require professional correction and retesting; raising the storage setting is not an acceptance shortcut.
- Visible completion , From accessible positions, check for intact covers, identifiable controls, unobstructed service access, and completed agreed finishes. Have the installer confirm required clearances and identify permanent condensate, pan, and relief-discharge routes where present. Ask how drainage was verified; a dry pan proves little. Dampness, temporary hoses, unfinished terminations, or loose-looking components need explanation and disposition. Do not operate a relief valve as a homeowner test.
- Included accessories , Have the installer demonstrate recirculation activation, delivery at the intended fixtures, and stopping behavior against the approved settings. For leak detection and automatic shutoff, request a manufacturer-approved simulation rather than an intentional plumbing leak. Verify the alarm, promised remote notifications, and actual valve response separately, then confirm normal operation is restored. Demonstrate included timers and monitoring functions, noting any power or communications dependency that prevented a test.
- Punch list and acceptance , For each failed or deferred item, record its location, deficiency, responsible party, correction date, and required retest or evidence. Cosmetic touchups can remain separate from operational acceptance. Unverified safety checks, leakage, incomplete protective components or drainage, outstanding required approvals, and failure to meet agreed delivery or temperature criteria should block full commissioning. The responsible professional must determine whether operation must remain suspended. Temporary bypasses are not completion.
15. Create a Model-Specific Maintenance and Service Plan
Build the service schedule around the exact model, not a universal annual checklist. Have the licensed service provider distinguish manufacturer-required maintenance, condition-dependent work, and optional preventive service. Use the owner and installation manuals together with warranty provisions to establish the initial intervals and any required service records. An annual appointment is not a substitute for tasks due sooner, and it does not mean every component needs annual replacement or cleaning.
Water conditions and operating history should refine that schedule. Available water-quality results, particularly hardness where scale is a concern, are more useful than judging water by appearance. High hot-water throughput, deposits found during previous service, or recurring screen blockage may support shorter intervals within manufacturer guidance. Light use does not eliminate corrosion or protective-component inspections. Ask the provider what finding would trigger an earlier visit and what evidence would justify extending an interval; neither change should override manufacturer requirements.
Homeowner participation should be limited to safe external observation and reporting. From a dry, accessible position, watch for moisture, corrosion streaks, obstructed air openings, unfamiliar sounds, and display messages. Note whether a change occurs during heating, after a large draw, or while the equipment appears idle. Assign physical maintenance, including exterior and removable-filter cleaning, to qualified service personnel. An accessible drain, screen, fitting, or relief-valve lever is not an invitation to operate it.
For storage equipment, separate sediment management from corrosion protection. A professional should determine whether draining or flushing is appropriate for the tank's instructions, condition, and service history; flushing is not a universal cure for noise or reduced output. Sacrificial anodes may need inspection and replacement, while powered anodes have different checks. Some tanks use other corrosion-protection designs. The plan should identify the actual design rather than schedule anode replacement solely by age. Removing an anode without an approved replacement strategy can compromise protection and may affect warranty coverage.
Storage service should also assess relief protection, expansion-control equipment where installed, connections, and evidence of leakage. Include installed mixing controls and leak-protection accessories according to their own service instructions. These are ongoing condition checks, not a repeat of installation acceptance: satisfactory hot-water delivery does not establish that a protective component still functions correctly. Leave relief-valve operation and pressurized-component testing to the professional.
For tankless equipment, identify what a service visit includes beyond descaling. Scale-control intervals depend on manufacturer guidance, water chemistry, throughput, and previous findings. The professional should use approved procedures and materials and address internal water screens, flow-sensing components, temperature sensors, and other inspection points specified for the model. A descaling visit alone does not establish why output has fallen. Fuel-fired models may also require burner, combustion, intake, vent, and condensate-system inspection, including a condensate neutralizer where fitted. Electric tankless models need their own electrical and heating-component checks rather than a combustion-service checklist.
Heat pump water heaters retain applicable storage-tank maintenance needs and add air-pathway, condensate, and refrigeration-system service. Schedule filter inspection and cleaning by service personnel according to the model and observed dust loading. Have them assess coils, fan condition, permitted ducting where present, and unobstructed airflow. Condensate service should address the drain, any trap or pump, and overflow protection where installed. Humid conditions can increase condensate production, but do not establish a universal cleaning interval. Report changed fan or compressor sounds and persistent operating alerts; refrigerant diagnosis, coil cleaning, and repairs belong to appropriately licensed professionals.
After service, retain the findings that affect the next decision: deposit severity, anode condition, protective-component concerns, unresolved faults, and the next due date or condition-based trigger. The useful record explains why an interval stayed the same or changed, rather than merely stating that the heater was serviced. Extended-absence and return-to-service planning belongs in Chapter 16.
- Request prompt professional guidance about stopping use and safe shutdown for new leakage, unexpectedly scalding water, relief discharge, or a protective-device trip. Do not wait for a second trip to report it, repeatedly reset breakers, or clear recurring lockouts to maintain operation.
- For gas odor, a carbon-monoxide alarm, smoke, fire, or immediate electrical danger, leave the area and seek emergency assistance from a safe location. With suspected gas, do not operate switches or use a phone in the affected area. Do not delay evacuation to collect records.
- Never touch wet electrical equipment, open a panel, or cap or obstruct a relief discharge. Have a professional distinguish condensate, plumbing leakage, and relief discharge rather than assuming visible water is harmless.
- When safe, record the time, displayed error, recent hot-water use, visible water location, and whether the symptom persists. Photograph only from an accessible position; do not recreate a fault through live testing or repeated operation.
16. Prepare for Seasonal Use, Rentals, and Future Ownership
Seasonal occupancy and rentals create a continuity problem: the person using the hot water may not know the system, and the person receiving an alert may be elsewhere. Assign an owner or manager to coordinate occupant reports, vacancy preparations, and service access. Name a backup who can act when that person is unavailable.
Make the owner handoff packet an index to the installation and service records, not a second set of operating instructions. Its first page should identify the equipment and location, current service provider, approved normal settings, and where to find the manufacturer manual, commissioning baseline, temperature plan, and maintenance history. Include installed accessories and their normal indications. Keep this information available outside the heater app. An incoming owner should also receive unresolved service issues and upcoming appointments, rather than having to infer them from old invoices.
Before an extended absence, have a licensed professional establish a departure and return plan for the installed model and plumbing system. The decision is not simply whether to leave the heater on. Compare the model's approved absence setting with expected vacancy duration, planned caretaker visits, accessory operation, and the lead time needed to restore service. Record who may select the approved user-level mode and who coordinates any professional shutdown work. The plan should also address an unexpectedly longer vacancy or a power interruption; do not assume the equipment resumes its previous schedule or mode.
Treat stagnant water as a separate issue from standby energy use. Keeping the heater operating does not keep unused branches fresh, and restoring its normal display setting does not establish readiness for occupancy. Ask the professional to define return actions using vacancy duration, system configuration, manufacturer instructions, and relevant public-health guidance. Identify any required professional flushing or other water-management work, including whether both hot- and cold-water branches need attention. Do not substitute an improvised high-temperature treatment. Arrange required work before guests arrive, with enough time for normal heating and confirmation that the system is ready for use.
Give rental occupants a short quick sheet based on the accepted performance in Chapter 14. State the expected use pattern, any established recovery interval, and known delivery delays without repeating sizing explanations or promising unlimited hot water. Identify only controls occupants are permitted to use, such as a labeled demand-recirculation button. Reserve temperature, mode, and schedule changes for the designated owner or manager under the approved operating plan. Never direct guests to adjust mixing valves, service valves, or electrical components to improve a shower.
Use time-stamped reports to decide what information a service provider needs, not to make guests troubleshoot. Compare the reported sequence with the commissioning baseline and actual occupancy. A complaint following unusually concentrated use calls for a different review from a new loss of performance during ordinary use, but neither proves a cause. Check authorized schedule changes and recent service records before labeling a complaint a guest-use issue. Recurring, unexplained, or worsening deviations merit professional assessment even if service later appears normal.
Connected controls need a durable account owner and a backup alert recipient. Where supported, use individual manager accounts with only the permissions needed; guests should not hold administrative access. Distinguish permission to view status, change approved settings, and receive alerts from responsibility to arrange on-site help. Confirm whether alerts depend on internet access, power, or a subscription. At a management or ownership change, follow the manufacturer's transfer process, remove former users, update recovery details and billing, and verify receipt of a supported test notification.
Request a performance review when use no longer resembles the original demand worksheet: seasonal occupancy becomes year-round, stays grow longer, fixtures change, or simultaneous demand increases. Rising energy use under comparable occupancy and utility-rate conditions, slower recovery, or repeated service calls also justify review. Supply the baseline and recent observations. The appropriate response may be service, revised approved scheduling, distribution improvements, or different capacity, not an automatic upgrade.
- Occupant report: Date and time; affected fixture; whether water started hot; approximate use duration; concurrent showers or appliances; and any display message visible from a safe, accessible position. Do not request deliberate fault reproduction or resets.
- Urgent route: Give occupants an immediately usable contact for leaks or safety concerns. For suspected gas odor, instruct them to leave the area and contact emergency services or the gas utility from a safe location, rather than waiting for a manager's reply.
- Vacancy and transfer check: Confirm the return date, service-access permission holder, backup responder, packet location, and new alert recipients. Transfer equipment records without retaining former guests' personal information.
About this guide: This resource provides general homeowner education, not a remote diagnosis. Actual conditions, code requirements, equipment, and safe repair options must be evaluated at the property.