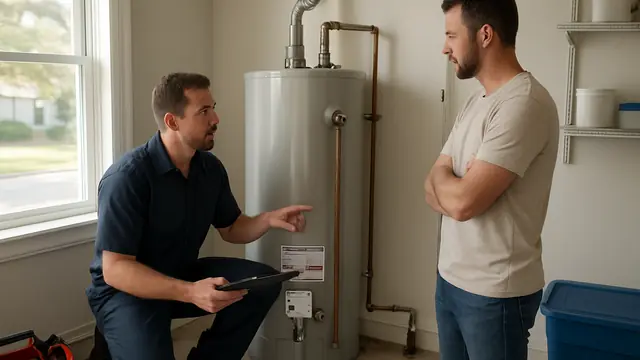
Stop and call for qualified help when plumbing water is near electrical equipment, sewage is entering occupied space, gas or burning odors are present, or a repair would require opening pressurized piping.
1. Define the Bathroom’s Job Before Choosing Fixtures
Begin with the bathroom’s job, not a shopping list. Identify whether it is the household’s main bathing room, a shared family bathroom, a guest bathroom or the only bathroom available to someone who cannot easily use another floor. Then name the most consequential problem the remodel must solve. A room can look dated yet function well; another may have attractive fixtures but fail its users every morning.
Plan for current users and reasonably anticipated needs during your expected ownership. Consider supervision, assistance with bathing, unfamiliar guests and changing physical abilities without assuming every possible future need must be accommodated now. Separate requirements needed immediately from future options worth preserving. Detailed movement and accessibility planning belongs in Chapter 3; here, establish whom the room must serve and which activities it must support.
Describe routines rather than preferred products. Do two people need running water simultaneously, or does one need only a mirror and a place for toiletries? Is bathing assistance a regular need? Is the tub used often enough to justify the space it occupies? Include cleaning responsibilities and the everyday items that need storage. Give frequent, consequential tasks more weight than rare inconveniences, while recognizing that an infrequent but essential activity may still be a priority.
Sort shortcomings into functional problems and aesthetic preferences. Difficulty entering the bathing area, repeated counter splash and storage that cannot be reached during normal use are functional concerns. Disliking a finish or cabinet style is a preference. Rank each concern by its effect on safety or usability, frequency, number of people affected and availability of an acceptable workaround. Conditions suggesting damage or faulty operation need evaluation rather than a cosmetic solution; Chapter 2 covers that assessment. Appearance can remain an important goal, but it should not displace an essential function unnoticed.
Choose a provisional level of intervention by asking what the existing arrangement prevents. A refresh retains fixture locations and concentrates on surfaces, storage and appearance. Targeted fixture replacement addresses a specific task while largely preserving the room. Substantial reconfiguration changes where activities occur and is justified when the arrangement itself blocks a priority outcome. These approaches can overlap. Keeping locations limits relocation work but does not establish replacement compatibility or eliminate concealed-work needs. Before accepting a move, state the benefit it must deliver and ask whether a less disruptive option could deliver the same result.
Define the project boundary by both location and purpose. The base scope might include this bathroom’s fixtures, necessary local plumbing work and restoration of affected surfaces. Identify whether adjacent rooms, other bathrooms, whole-home repiping and water-heater replacement are outside that base scope. An exclusion is not proof that outside work will be unnecessary: a dependency essential to the bathroom’s agreed performance must be evaluated separately from elective improvements. Chapters 8, 10 address the technical dependencies; do not turn them into automatic whole-home upgrades.
Set an owner-budget ceiling for the complete project, not just fixtures or a construction subtotal. Organize planned spending into four categories: essential infrastructure and delivery costs; comfort and convenience; finishes above the functional baseline; and a reserve for uncertain conditions. Essential costs include the professional design, installation, coordination and affected-surface restoration needed to deliver the agreed scope, plus applicable approval costs. Comfort covers improvements to daily tasks. Finish upgrades cover discretionary appearance choices. Classify mixed-purpose items by their primary benefit so they are not counted twice.
Account within that ceiling for owner-purchased products, delivery, taxes and any necessary temporary arrangements that are absent from a contractor’s price. A product allowance is money assigned to an incompletely selected item; it is not the same as the uncertainty reserve. Fund essentials first, then allocate the remainder among comfort and finishes while protecting the reserve. Size that reserve with professional input according to unresolved conditions and the extent of proposed changes, not a universal percentage. If the plan exceeds the ceiling, reduce optional features, finish premiums or relocation ambitions before sacrificing necessary work. Chapter 12 explains how to compare proposals against this framework.
Finish the brief with observable success criteria rather than adjectives such as “luxurious” or “spacious.” For each priority, identify the activity, intended user and acceptable result. These criteria guide design choices now and provide a basis for acceptance later. Resolve conflicts explicitly: more storage, more open space and more fixtures cannot always coexist.
- Bathing: Identify the task that must become easier and the intended level of independence or assistance.
- Sharing and storage: List activities that must occur together and everyday items that must fit while leaving a defined counter area usable.
- Splash and cleaning: Define an ordinary-use splash boundary and identify cleaning gaps or obstructions the new design must eliminate.
- Tradeoffs: Name nonnegotiable outcomes, acceptable compromises and the optional upgrades to remove first if the budget tightens.
2. Document Existing Conditions Without Opening the Building
Build a pre-design record that shows the bathroom as it exists, not as an old plan or proposed layout suggests it should be. Concentrate on accessible dimensions, visible conditions and symptoms noticed during ordinary use. This record helps the designer identify which decisions can proceed and which depend on further investigation; it is not a substitute for a professional survey.
Photograph the room from the doorway and accessible corners, then pair close-ups with wider views that establish their location. Useful subjects include connections already visible inside cabinet storage areas, the toilet base, tub edges, shower threshold and damaged finishes. Include adjacent wall or floor surfaces when a stain extends beyond a fixture. Date the images and retain earlier photographs if a mark changes. Do not remove trim, covers or building materials to obtain a clearer view.
Make a simple sketch with wall-to-wall dimensions at finished surfaces, ceiling height, door and window locations, and the outside dimensions of fixtures and cabinets. Record window-sill height and visible changes in floor level where they can be measured safely. Identify measurement endpoints: tile face, painted wall and baseboard face are different references. Mark obstructed dimensions as approximate. These measurements support early planning, not fixture ordering or installation.
Capture readable brands and model labels without dismantling equipment or moving fixtures. A visible faucet marking may identify only the trim or product family, not the valve behind the wall. Attach any existing plans to the sketch, noting their date and whether they show proposed work or completed construction. Differences between the drawing and the room are useful evidence; do not silently alter the sketch to make them agree.
Keep a short symptom log during normal routines. Note hot-water arrival time if conveniently observable, unexpected temperature changes, weak-feeling spray, slow drainage, gurgling, recurring odors and where splash reaches surrounding surfaces. Record the fixture, date and circumstances, for example, first use after an absence or another fixture already running. Distinguish a longstanding limitation from a recent change. Describe what happened rather than naming a cause: weak spray is not a pressure measurement, and slow drainage does not locate a blockage.
Do not create test conditions by running extra fixtures, attaching gauges, manipulating suspect valves or repeatedly reproducing a problem. If active leakage, sewage backup or fixture instability is evident, stop using the affected fixture and obtain professional assessment. Avoid walking on flooring that feels soft or unstable; do not probe or load-test it.
Collect available evidence of earlier work: remodeling plans, repair invoices, inspection reports and photographs taken before concealment. Look for location, date and extent rather than general statements such as “plumbing replaced.” A repair invoice may cover only one short section, while an undated photograph may not establish which wall it shows. Inspection records document the work reviewed at that time, not necessarily subsequent alterations or present condition. This is a baseline for design; Chapter 16 covers the completed bathroom’s ownership file.
An initial accessible inspection lets a licensed plumber examine visible connections, supports, markings and deterioration, and compare those observations with the symptom log. Visible pipe material at one connection does not establish the material throughout a concealed branch. Routing, hidden joints, vent connections and conditions beneath fixtures may remain unknown until authorized professional access is available. Ask the plumber to identify the specific unknowns that could change the proposed layout; detailed water-delivery and drainage evaluations belong in Chapters 8 and 9.
Stains, swollen cabinetry, peeling finishes, persistent musty odors or soft flooring warrant evaluation before design proceeds in the affected area. Their appearance alone cannot distinguish plumbing leakage from enclosure defects, condensation or water entering elsewhere. Depending on the evidence, the plumber may need input from a qualified moisture assessor, licensed building contractor, waterproofing specialist or structural engineer. A dry surface during one visit does not establish that concealed materials are sound.
- Verified facts: Record the observation, location, date and source. Distinguish current finished-surface measurements from dimensions copied from older drawings.
- Working assumptions: Identify the inference supporting a preliminary design decision and what evidence would confirm or overturn it. Do not present an inferred pipe route as surveyed.
- Unresolved conditions: Link each significant unknown to the decision it affects and the professional evaluation or authorized access needed to resolve it.
- Preliminary drawings: Keep documented existing conditions, approximate dimensions and proposed work visually distinct. Carry unresolved constraints forward rather than letting a polished drawing imply certainty. Chapter 14 addresses discoveries during construction.
3. Arrange the Room for Movement and Future Accessibility
Plan the bathroom as a sequence of movements: entering, closing the door, approaching each fixture, using it and leaving. On a scaled drawing, show finished surfaces, fixture projections and the operating space of room doors, shower doors and drawers. A clear route with everything closed may disappear when someone opens storage or enters the shower. Measure usable space at its narrowest points, not just wall to wall, and give hampers and wastebaskets locations outside the movement paths.
Distinguish three goals before reserving floor space. General convenience reduces awkward movements for today's household. Aging-in-place planning preserves options as balance, strength, vision or endurance change. A design for a specific mobility need responds to the person's actual abilities, equipment and assistance. These goals overlap but are not interchangeable: a layout that feels generous to a walking user may not support a wheelchair transfer, and a transfer arrangement suited to one person may be wrong for another.
For a mobility aid, evaluate the complete maneuver rather than a turning circle alone. The designer should account for equipment width, footrests, turning behavior and the user's approach technique. Can the person move beyond the doorway, reach the latch and close the door? Is there room to approach the toilet from the necessary side and park a walker where it remains reachable? Can a bathing chair reach its intended position? Clear areas may overlap only where the activities can actually share them; a door sweep or parked chair must not occupy space needed at that moment.
Seated use requires a workable relationship between approach space, task surface and reach, not merely an empty patch of floor. Caregiver assistance requires a separate assessment: the helper may need space beside the user, behind a chair or on both sides during a transfer. Independent wheelchair use does not establish that assisted care will fit. If two-person assistance or transfer equipment is foreseeable, identify the equipment and assistance method before fixing room dimensions. Detailed seated-use vanity coordination belongs in Chapter 5.
Compare doors by the space and maneuver each demands. An inward-swinging door leaves the hallway clear but consumes interior space and may be blocked by someone who falls behind it. An outward-swinging door avoids that interior sweep and may improve emergency access, but can strike someone outside or obstruct an adjacent route. Evaluate the user's position while operating either door, clearance on both sides and collisions with nearby doors.
Sliding doors remove the swing arc but introduce other constraints. Surface-mounted sliders need unobstructed wall space and may provide less sound or visual privacy, depending on detailing. Pocket doors need a suitable wall cavity, which can conflict with plumbing or planned support anchorage. Compare handle grip, latch operation and closing effort from the intended seated or standing position. Ask about privacy hardware with appropriate emergency release, and verify the actual clear opening rather than relying on the nominal door width.
Set reach and control-location goals before selecting fixture models. From each likely use position, consider access to switches, towels, toilet paper and everyday storage without excessive leaning, twisting or releasing needed support. A reach over an obstruction is different from an unobstructed reach; countertop depth and cabinet doors can make an apparently close item unusable. Reserve workable control zones now, then coordinate the specific sink and shower arrangements in Chapters 5 and 6.
Identify where support may be needed for standing, turning and transferring, including likely future grab-bar locations. Check these zones against doors, storage and controls before finishes are chosen. Towel bars are not substitutes for designed supports. Have licensed professionals determine and provide the required anchorage; a future support location is useful only if the wall assembly can accommodate it.
An accessibility specialist is useful when maneuvering space, door operation or competing layout constraints are difficult to resolve. An occupational therapist can assess how transfer technique, fatigue, balance and caregiver tasks affect the plan. Where helpful, review a full-size layout mock-up with the user and specialist rather than asking someone to attempt an unsafe transfer. The designer should verify requirements applicable to the property and project; a generic accessibility diagram or commercial standard is not automatically the governing residential layout. Required minimums and individual usability remain separate checks.
- Can the user enter, close the door and approach each fixture without backing into an obstruction?
- Will mobility equipment remain reachable during and after use without blocking the exit?
- Can a caregiver assist from the necessary side and still move out safely?
- Which anticipated adaptations fit the reserved space, and which would require a different room layout?
4. Select a Toilet That Fits the Room and Its Users
Compare specific toilet models in the planned finished room, not labels such as “compact” or “comfort height.” The important dimensions are the complete fixture’s projection, width and installed seat height. Have the designer check these against the movement and accessibility criteria established in Chapter 3.
For a typical floor-mounted toilet, rough-in is the distance from the finished wall behind the toilet, not the baseboard, to the waste-outlet centerline. The licensed plumber should confirm the flange location, condition and elevation relative to the proposed finished floor. Existing mounting bolts offer only a preliminary reference. Added wall finishes can change the available rough-in, and a toilet intended for one dimension cannot be assumed to fit another. Where a manufacturer offers alternate rough-in adapters, the plumber should verify the resulting installed dimensions.
Use the dimensional drawing to check overall projection, tank-to-wall clearance, lid-removal space and access to the seat fasteners. Toilets sharing a nominal rough-in can occupy different amounts of floor space. A skirted base may conflict with an existing supply outlet or shutoff even when the waste connection aligns. Resolve that model-specific constraint before ordering.
Round-front bowls generally project less into the room, preserving space where an elongated model might crowd an approach or door swing. Elongated bowls offer a longer seating surface that some users prefer. Compact elongated models seek to retain that seating shape within a shorter overall fixture, but “compact” is not a standardized dimension. Compare actual projection and seat opening: a shorter tank or body does not necessarily mean a smaller usable seat, and a longer toilet does not necessarily feel more comfortable.
Evaluate height at the top of the intended seat rather than at the ceramic rim. A bidet seat can raise the sitting surface and alter its slope or usable opening. A taller toilet may make lowering and rising easier for some users while leaving shorter adults or children with inadequately supported feet. For a person transferring from a mobility device, height must suit the transfer method and device. When possible, assess showroom models for foot support, stability and ease of standing; use the accessibility review in Chapter 3 for individual mobility needs.
Separate flushing evidence from marketing descriptions. Review rated water use, flush mechanism and manufacturer operating requirements for the exact model. WaterSense certification indicates that a qualifying toilet meets defined efficiency and performance criteria, not that every certified model behaves identically. Independent MaP testing can provide evidence of bulk-waste removal under controlled conditions. Check that a result applies to the proposed bowl-and-tank combination, not merely a similar product name.
Bulk-removal testing does not fully describe bowl rinsing, splash, sound or the need for a second flush in everyday use. Gravity and pressure-assisted models have different sound profiles and supply requirements; a pressure-assisted flush may be more pronounced. For dual-flush toilets, compare both rated volumes and whether users can distinguish and operate the controls easily. Higher water consumption alone does not establish better performance, and a toilet upgrade cannot correct defective drainage.
Wall-hung toilets leave the floor beneath the bowl open for cleaning and allow seat height to be set during design. Their shorter visible projection must be weighed against the wall depth needed for the carrier and concealed tank; building out the wall can consume the apparent space saving. The selected bowl, carrier, tank and actuator must form an approved system, with waste-connection geometry established before the layout is finalized. A floor-mounted bowl with a concealed tank also needs planned wall space, although its support arrangement differs. Chapter 10 covers structural coordination; Chapter 11 covers service access and component procurement.
Choose a bidet seat or integrated bidet toilet early enough to accommodate its connections and user controls. Resolve these product-specific questions before specifying the toilet:
- Will the seat fit the bowl’s contour, mounting-hole arrangement and clearance ahead of the tank? Round or elongated labeling alone is insufficient, especially with concealed fasteners or unusual bowl shapes.
- What water supply does the model require? Have the plumber confirm connection locations, accessible shutoff placement, operating limits and required backflow protection. Some non-electric models require a separate hot-water connection; others use cold water only.
- For powered equipment, what electrical supply, receptacle location and protection are required? A licensed electrician should plan the provision around the selected model. Do not rely on an extension cord.
- Will the seat’s added height, smaller opening and control position suit the users? Compare remote and side-mounted controls for reach and legibility, and check which washing and flushing functions remain available during a power outage.
5. Match the Vanity, Basin and Faucet as One Assembly
Select the vanity, basin and faucet together using actual product dimensions. A cabinet can fit the room yet lose its most useful drawer to the bowl; a faucet can fit its mounting holes yet leave too little room for handwashing. Compare a plan view showing counter space and faucet position with a section showing the rim, outlet, bowl underside and cabinet interior. Nominal vanity width alone reveals little about how the assembly will work.
An undermount basin permits wiping water directly from the counter into the bowl, but its underside seam still needs cleaning. The countertop’s overhang into the opening affects both seam access and the usable opening. A drop-in basin covers the cutout with a rim that interrupts wiping and creates a perimeter where residue can collect. Compare inside bowl dimensions and remaining counter area: a broad rim consumes space without necessarily providing more washing room.
A vessel basin raises the working rim above the counter. Pair its height with the cabinet and top rather than assuming a conventional vanity height will remain comfortable. Allow cleaning space around the vessel’s exterior, especially between the bowl and backsplash. An integrated basin and top remove the separate sink-to-counter joint; molded ledges, tight corners and shallow slopes can still complicate cleaning. Basin geometry matters more than mounting style for splash containment. Broad, shallow bowls may provide room for hands while offering less containment than their outside dimensions suggest.
Evaluate faucet reach, outlet height and stream angle against the bowl’s interior shape. Reach locates the outlet horizontally from the manufacturer’s mounting reference; an angled stream may land beyond that point. The stream should enter a useful washing area with enough room for both hands, rather than hugging the back wall or approaching the front rim. It does not need to hit the drain precisely. A higher outlet can clear a vessel rim, but increasing the fall distance can increase splash. A deep bowl is not a cure if hands must be held high above it to meet the stream. Where a working display is available, ordinary handwashing can reveal relationships that dimensional drawings alone cannot.
For a deck-mounted faucet, match the hole arrangement and allowable mounting thickness to the actual basin ledge or countertop. A thick-looking decorative edge does not necessarily indicate the thickness at the faucet hole. Check handle movement against the backsplash, room for fingers around the controls and cleaning access around the base. With a vessel basin, verify that the spout clears the rim and reaches far enough into the bowl; a tall faucet is not automatically a compatible faucet.
A wall-mounted faucet clears the counter of its base but makes the finished wall a critical dimensional reference. Spout projection must align with the basin’s final front-to-back position, and outlet height must relate to the installed rim. The concealed body must sit within the manufacturer’s permitted depth relative to the finished wall. A change in wall thickness can therefore affect both trim fit and effective spout projection. Set these assembly dimensions with the designer and licensed plumber; Chapter 10 addresses coordination of the wall layers.
Inside the vanity, bowl depth, countertop thickness and mounting details determine how far the basin extends into storage. The drain fitting, trap and supply connections require additional space below and behind it. Full-depth drawers, shelves and partitions may occupy that same space. Compare cabinet interior drawings with the selected basin and the plumber’s proposed connection locations before ordering. Factory-shaped or shortened drawers may accommodate plumbing, but their fronts can overstate their usable capacity. Do not assume a generic cabinet cutout will suit every basin.
Two basins offer the clearest benefit when two people regularly wash or groom simultaneously and have enough elbow room to do so. Within a fixed width, the second bowl reduces landing space and creates another plumbing zone inside the cabinet. Compare usable drawers and clear counter areas beside each bowl, including room for toiletries and grooming tools. If the main conflict is access to a mirror or shared supplies, a second basin alone may not solve it.
For seated use, assess clearance beneath the actual bowl, supports and piping, not merely beneath the counter edge. An open vanity is not inherently accessible. Provide suitable protection against contact with hot piping and sharp or abrasive surfaces without taking away needed knee space. Faucet controls must be reachable from the intended position without leaning over an obstructing rim; check operating force and the full handle movement, not just handle style. Chapter 3 covers user-specific accessibility planning.
6. Specify the Shower Experience and Control Strategy
Choose shower outlets around actual bathing tasks: standing rinsing, keeping hair dry, seated bathing or helping another person wash. Identify a default outlet and decide whether additional sprays must operate with it or merely alternate. A fixed head and a reachable handheld often cover more useful tasks than several body sprays, with fewer operating steps.
A fixed wall-mounted head offers consistent positioning, but its height, angle and adjustment range must suit the users. An overhead rain-style head provides coverage from above, which can make keeping hair dry or directing water to one area less convenient. A handheld allows targeted rinsing; compare grip shape, weight, mode-selector effort and how easily it releases from and returns to its holder. A large spray face may be awkward for someone with limited grip even if its spray feels comfortable.
A rail-mounted hand shower lets users change the docking height for standing or seated use. Check whether the slider can be operated comfortably and holds the head securely at the intended angle. A fixed bracket is simpler but cannot serve different heights as readily. An ordinary slide rail is not a grab bar unless specifically designed and installed for that purpose. Add body sprays only when their positions serve a defined need; their usefulness depends on where the person stands or sits, not simply on how many are installed.
Pressure-balancing and thermostatic valves manage temperature stability differently. A pressure-balancing valve responds to changes in relative hot- and cold-water pressure, helping limit sudden temperature changes when another fixture operates. It does not directly sense mixed-water temperature and should not be assumed to correct changes in incoming water temperature. Many models use a single handle for both starting flow and choosing temperature, with no independent volume adjustment, although configurations vary.
A thermostatic valve senses mixed-water temperature and adjusts the mixture toward the selected setting within its operating limits. It often allows a preferred temperature setting to remain unchanged while another control starts and stops flow. Temperature regulation alone, however, does not establish whether the assembly includes shutoff, volume adjustment or outlet selection. Some products combine thermostatic and pressure-balancing functions. Compare the selected model’s protective functions, temperature-limit provisions and response to supply interruption rather than inferring protection from the number or appearance of handles.
A diverter or transfer valve selects the water’s destination; a volume control regulates flow through its assigned path. Some selectors allow only one outlet at a time, while others offer shared settings. Count supported outlet combinations rather than selector positions: a three-position selector may mean head only, handheld only and both together. Separate volume controls can allow independent adjustment and simultaneous operation only if the complete valve arrangement supports those functions. The operating sequence should make it clear how to select each outlet, adjust flow and shut everything off.
Compare spray character separately from rated flow. Concentrated jets deliver water over a smaller area; broad patterns spread it across more of the body. Aeration, droplet size and pulsing also affect perceived warmth and rinsing. Higher flow is not automatically more comfortable, and a wider spray face does not necessarily mean better coverage. A working display can help reveal gaps in the pattern, comfortable spray distance and whether mode changes are easy to make.
Read rated flow with its stated test pressure and the manufacturer’s operating requirements. The plumber should check minimum operating flow for the chosen valve and restrictions on shared outlet use. A shared setting does not promise that each spray will perform as it does alone. Chapter 8 covers whether the home can deliver the selected package’s water and hot-water demand.
Place startup controls within reach from the entrance without requiring the user to stand beneath the initial spray. Evaluate that reach with the door in its actual open position, not just on a clear floor plan. For seated use, coordinate the handheld holder, hose connection and hose length so the user can retrieve and dock the spray without stretching. The hose should reach useful washing positions without snagging on controls or crossing the entry path.
Coordinate the bench, spray angles and enclosure opening as one arrangement. A docked handheld should aim into the bathing area, not through the entrance. Water striking a seated person or bench can deflect toward an opening even when the head points inward. A bench also reduces room to step away from the spray. Review both standing and seated spray paths before choosing the door configuration; glass or a curtain should contain incidental splash, not compensate for an opening directly in the spray path. Floor slope and waterproofing coordination belong in Chapter 10.
7. Decide Whether and How to Include a Bathtub
A bathtub should earn its place through expected use. Consider how often household members soak, whether children need supervised bathing, and whether another bathroom already provides a suitable tub. Retaining the home’s only tub preserves a bathing option, but it does not establish a predictable resale benefit. Compare that option with the everyday value of the space it occupies.
Retain a tub when its bathing well suits users, its condition supports continued use, and its location works with the remodel. Replace it when entry height, interior fit or bathing functions are the problem. Omit it when likely use does not justify the footprint. Compare complete room layouts: removing a tub does not automatically make all of its space available to a shower. Chapter 3 addresses circulation and accessibility planning.
An alcove tub fits between enclosing walls and often combines bathing and showering in one footprint. For combined use, select a model with a manufacturer-approved shower-wall interface rather than assuming any soaking tub will work. A drop-in tub fits within a constructed surround; its deck adds width and length without necessarily enlarging the bathing well. The surround must accommodate the selected filler and waste connections. A broad rim or decorative deck is not automatically suitable for sitting or transferring.
A freestanding tub needs space around its exterior that can actually be reached for cleaning. Floor-mounted fillers require a coordinated floor connection and secure mounting; wall-mounted fillers constrain the tub’s distance from the wall; tub-mounted fillers require a rim designed to accept them. Drain location also remains model-specific. Choose the tub and filler together so the stream clears the rim without obstructing entry or the reclining bather.
A walk-in tub lowers the entry threshold but introduces other fit and operating questions. Evaluate door opening width, seat shape, foot space, latch effort and the user’s transfer method. Many models require the user to enter before filling and wait until water drops below the door opening before exiting. That sequence makes filling and draining time part of bathing comfort, not merely convenience. Check interior clearance for an inward-opening door and room clearance for an outward-opening one; neither configuration is universally easier.
Compare interior drawings rather than advertised exterior dimensions. Backrest slope, armrests and molded seats affect legroom and usable width. A permitted, safe dry seating trial can reveal whether the user can recline comfortably and reach the controls. Evaluate step-over height from the finished bathroom floor, as well as the descent into the bathing well. A low-looking exterior does not necessarily mean an easy exit from inside.
Usable soaking depth depends on the overflow level and interior geometry, not rim height. Confirm the reference used for a published depth and where the waterline would fall on a seated user. A deep well may improve immersion while making entry harder and increasing the amount of water needed. Children require close supervision regardless of filling depth.
For filling expectations, distinguish published capacity to the overflow from the water needed for an ordinary bath. The bather displaces water, and preferred immersion varies. Intended fill volume divided by delivered filler flow gives an approximate filling time, but a published flow rating may assume conditions the home does not provide. Consider whether users fill before entering, sit through filling, or routinely top up during a soak. Have the plumber evaluate expected filler performance; Chapter 8 addresses water delivery and hot-water adequacy.
The waste-and-overflow assembly joins the bottom outlet and overflow opening to the tub’s drainage connection. Its fit depends on outlet positions, tub depth and any proprietary overflow design, not simply matching the visible finish. An overflow is not protection against every overfilling scenario and may not carry the filler’s full output. Never leave a filling tub unattended.
- Match drain controls to the user: toe-touch stoppers need downward pressure, lift-and-turn styles need grasping and twisting, and cable-operated controls may allow operation from higher on the tub. Check whether the stopper occupies space where the bather’s heel rests.
- Distinguish water jets from air jets. Whirlpool systems recirculate bathwater through pumped jets; air-bath systems use a blower to introduce air. Compare sensation, operating noise and any minimum water level required before activation.
- Powered tubs require licensed electrical coordination for the selected pump, blower and any specified heater. Their equipment must remain reachable for servicing without destructive removal of the finished surround; use Chapter 11’s serviceability review.
- Read the model’s cleaning and purge requirements before choosing a powered system. Whirlpool circulation cleaning and air-system drying routines differ, as do restrictions on oils, salts and other bath products. Choose features whose required care fits the household’s bathing routine.
8. Verify Water Delivery for the Chosen Fixture Package
Before approving the fixture package, have the licensed plumber assess whether the supply system can support its intended use. Start with realistic combinations: the shower outlets that will run together, vanity use during bathing, and competing draws from another bathroom or appliance. Distinguish routine combinations the design should support from occasional overlap the household is willing to avoid. This assessment is more useful than simply adding every fixture’s advertised flow.
The assessment should use product technical data for operating pressure, valve capacity and the outlet combinations selected in Chapter 6. A tub filler’s published flow may depend on inlet pressure the home cannot maintain while other fixtures run. Shower valves, diverters and connecting piping can also limit delivery. The relevant question is whether the complete supply path can deliver the required flow at adequate pressure, not whether an individual fitting has a sufficiently high rating.
Pressure and flow are related but different. Static pressure is measured with no water moving; residual pressure is what remains during a draw. A satisfactory static reading does not establish adequate delivery under demand. Professional evaluation should account for available pressure during relevant use, pipe material and internal diameter, developed route length, elevation changes, fittings, valves and shared upstream piping. Regulators, filters and treatment equipment may introduce additional pressure loss. Hot and cold supply paths both matter because the mixing valve depends on their delivery conditions.
Locate the constraint before expanding the work. A larger bathroom branch cannot overcome a restrictive shared supply upstream, while replacing extensive piping may accomplish little if the limiting component is a valve or filter. Targeted changes should address the identified bottleneck. Pipe sizing also involves a tradeoff: increasing diameter can reduce friction loss, but increasing hot-water pipe volume can lengthen the wait for hot water. Neither uniformly larger piping nor the shortest possible route is a complete design criterion.
Evaluate hot-water capacity separately from supply pressure. A multi-outlet shower can increase the sustained hot-water draw, while a larger tub can require a substantial volume in one filling cycle. Duration and overlap with other uses matter as much as peak flow. The hot-water share of the mixed supply depends on incoming cold-water temperature, delivered hot-water temperature and the desired bathing temperature. Total fixture flow therefore should not be compared directly with a heater’s nominal tank capacity.
For a storage heater, assess usable stored hot water and recovery during and between draws. For a tankless heater, assess output at the required temperature rise rather than relying on a maximum-flow headline; minimum activation requirements may also affect low-flow use. Where incoming water temperature varies seasonally, the assessment should reflect the more demanding condition. Heater replacement is not automatic. Alternatives include reducing simultaneous shower outlets, selecting lower-demand fixtures, spacing major draws or correcting a delivery restriction. Correcting a restriction improves delivery but does not create additional heating capacity.
Hot-water arrival time is a third, distinct issue. Cooled water in the supply route generally must be displaced before hot water reaches the fixture. Longer runs and larger internal pipe volume increase that displacement; lower-flow outlets can take longer to clear it. First consider bathroom-specific routing: a shorter branch from an appropriate hot-water trunk, fewer unnecessary detours, and connections arranged to avoid long individual runs to frequently used fixtures. Insulation slows heat loss between uses but does not make cooled standing water instantly hot.
Any proposed recirculation system warrants a separate compatibility and energy-use review. The designer should evaluate heater requirements, return routing, pump selection, controls and how much uncirculated branch remains between the loop and each fixture. A system using cold-water piping as a return path can temporarily warm the cold supply. Recirculation may reduce water discarded while waiting, but circulating warm water increases distribution heat loss and uses pumping energy. Demand activation limits operation to requested periods but may require a wait after activation; schedules serve predictable routines but can run when nobody needs hot water. Temperature controls alone do not establish when circulation is useful.
Complete the delivery design with fixture-level temperature protection, building on the control selections in Chapter 6 rather than reselecting them here. The plumber should verify protection at each bathing fixture, operating-pressure and flow compatibility, and the required adjustment of temperature limits. Heater-temperature changes are not substitutes for appropriate controls. Any proposed change to storage temperature or central tempering must account for equipment requirements, hygiene considerations and scald protection together.
- Which simultaneous-use combinations can the design support, and what limitations remain?
- Does each proposed change address pressure loss, hot-water capacity or arrival time, and is it being credited only for the problem it can solve?
- Can targeted bathroom routing meet the need before broader repiping or recirculation is considered?
- What delivery and temperature-protection criteria should carry forward to the completion demonstration in Chapter 15?
9. Plan Drainage and Venting Around the Actual Layout
A fixture that fits on the floor plan may not fit the drainage system. Each proposed location needs a workable path from its outlet and trap to a suitable downstream connection, with enough elevation difference for gravity drainage. Before settling a relocated toilet, shower or vanity, have the licensed plumber compare routes. A short move across existing piping paths can disturb more of the building than a longer move along them.
The controlling dimensions are largely below the finished floor. The fixture outlet, trap depth, horizontal drain and downstream connection must work together. If the receiving connection is too high, the available fall may be insufficient. Longer horizontal runs consume more vertical space because slope must continue throughout the route. A low-profile shower can be especially constrained by the space needed for its trap. Raising the bathing surface or floor may provide room, but it also changes entry height and transitions; it should not be treated as an inconsequential plumbing fix.
Ask the plumber to compare pipe routes by usable depth, obstructions, connection elevation and changes of direction, not distance alone. A route that fits at both ends may still encounter a beam, footing or crowded wall midway through. If retaining the existing fixture arrangement avoids those obstacles, that is a meaningful advantage even when relocation would improve the room visually. Chapter 10 addresses the structural and waterproofing coordination needed to develop the chosen route.
Drain sizing must account for the proposed fixtures and everything already discharging into the shared branch or stack. The plumber should evaluate fixture discharge characteristics, connected drainage fixture-unit loads, existing pipe condition and applicable sizing requirements. Drainage fixture units represent probable waste discharge loading, not faucet flow rates. Adding a basin or changing a bathing fixture can warrant reassessment even when most fixtures stay in place. Oversizing pipe does not correct an unsuitable slope or an inadequate downstream connection. Fitting selection, direction changes and provisions for clearing blockages also belong in the route assessment.
Traps and vents must be designed together. A trap retains a water seal that limits sewer gas entry; venting manages pressure changes that could disrupt that seal. The trap arm, the drain section between a trap and its vent connection, has constraints involving length, slope and configuration. Moving a vanity away from its vented wall, relocating a toilet, adding a shower or changing the order of connections can require a new venting review. An existing shared connection does not establish that the revised arrangement qualifies for wet venting.
Vent routing should therefore be resolved alongside waste routing. Nearby vent piping is not automatically suitable for a relocated fixture. Where an air-admittance valve is proposed, the plumber must establish whether it is allowed and appropriate for the application. It admits air but does not relieve positive pressure or replace every function of an outdoor vent. Detailed service-access planning belongs in Chapter 11.
Slabs and framed floors create different disturbance patterns. Relocating drains beneath a slab may require professional concrete cutting, excavation and restoration of the affected floor assembly. A route crossing a footing introduces a different constraint from one entirely within an unobstructed slab area. With framed floors, access from below may avoid some bathroom-floor demolition, but joist direction, beams and finished ceilings can limit the route or shift restoration into the room beneath. Neither construction type guarantees easy relocation. Compare the full area affected, not simply the amount of new pipe.
Investigate downstream drainage when symptoms or the proposed added load raise a specific concern. Recurring backups, poor drainage at several fixtures, prior sewer repairs or a questionable connection may justify further evaluation before the remodeled bathroom is connected. One slow basin alone does not establish a whole-line defect. A camera inspection is useful when viewing pipe interiors could reveal damage, obstructions or connection conditions that would change the scope. It is not automatically necessary for every remodel, and camera footage alone does not establish adequate capacity, correct slope or proper venting.
Address drainage noise while routes and wall assemblies remain design choices. Waste lines beside a bedroom or above a quiet living area can make ordinary discharge more noticeable. Discuss whether a different route, suitable pipe material or compatible acoustic treatment offers the better tradeoff. Proper support and isolation at supports and penetrations can limit movement and structure-borne sound; insulation alone is not a substitute. The design should accommodate required pipe supports without undermining the intended acoustic separation.
10. Coordinate Plumbing With Structure and Waterproofing
Plumbing locations must work with the supporting structure and the complete waterproofed assembly, not just the fixture layout. The critical dimensions are the space available for pipes and fittings, the elevations needed for drainage, and the finished surfaces that valves, outlets and drains must meet.
The designer or lead licensed contractor should determine whether a proposed tub, recessed shower or concealed carrier needs evaluation by a structural engineer. Tub support must account for water and occupants as well as the fixture itself. A shower recess can affect floor strength and stiffness; tile also needs a substrate that limits movement. A concealed carrier transfers loads through specified attachments, so its product rating does not establish the adequacy of the existing wall or floor. These features need support details suited to the actual assembly.
The plumber should coordinate routes and fitting space with the designer and structural professional before rough-in depends on framing cuts. Engineered joists and trusses require their applicable manufacturer or engineered details, not cutting rules borrowed from ordinary lumber. Slab penetrations may require investigation for reinforcement, post-tensioning or embedded services. Where a route conflicts with structure, compare a chase, thicker wall or fixture shift with structural alteration. The comparison should include lost room space and resulting finish elevations, not merely whether a pipe can fit.
Select the shower drain connection and waterproofing method together. A bonding-flange drain joins a compatible bonded membrane near the tile assembly; a clamping-ring drain commonly connects to a liner beneath a mortar bed. Matching outlet sizes do not make these connections interchangeable. Before purchase, the plumber and waterproofing installer must establish a manufacturer-supported connection, including any adapter. They must also reconcile drain support, membrane elevation, mortar or tray thickness, tile thickness and grate adjustment. Where the assembly uses weep passages, its detailing must preserve that drainage path. A linear drain permits a single-plane floor only when its position, length and shower geometry support that slope arrangement.
A curbless entrance requires an elevation section through the shower and adjoining bathroom. It should show the supporting floor, sloped waterproofing, tile surface, drain and doorway transition. Recessing the shower may require structural redesign; raising the surrounding floor may instead create a threshold at the bathroom door or affect adjacent fixtures. Neither option is automatically simpler. The finished entrance must reconcile usable access with slopes that direct water inward rather than toward the rest of the room.
Without a curb, water containment depends more heavily on floor geometry, enclosure placement and spray direction. The design must define how far waterproofing extends beyond the shower and how it terminates at walls and transitions. Waterproofing an adjacent floor protects the assembly beneath it but does not prevent surface water from traveling through a doorway. Benches, niche sills and other horizontal wet-area surfaces also need drainage slope at the waterproofing layer, not just in the visible tile.
Valve depth and outlet projection must reference the actual finished-wall buildup: backer material, waterproofing, setting material and tile. The plumber should use that buildup with the manufacturer's finished-wall reference and permitted adjustment range. A thicker tile selection can leave trim unable to seat or alter a spout's usable projection. Wall-mounted faucet outlets likewise depend on the final wall plane. Penetrations need the waterproofing system's prescribed seals or collars; decorative escutcheons alone should not be treated as waterproof connections. Broader component purchasing and service-access decisions belong in Chapter 11.
At each moisture-sensitive interface, assign the physical work rather than relying on a broad label such as “tile installation.” Tile and grout do not replace waterproofing. Substrate preparation, membrane continuity, movement-joint treatment and attachment sealing must agree with the selected assembly. Ventilation addresses airborne moisture, not leaks: its duct route and exterior termination must coordinate with framing and the exterior weather barrier, while wet-area equipment placement must meet applicable product requirements.
- Plumbing, waterproofing interface: identify who supports the drain, connects the membrane and seals valve and outlet penetrations.
- Waterproofing, tile interface: identify who establishes slopes, handles corners and changes of plane, and preserves drain adjustment and drainage paths.
- Structure, enclosure interface: coordinate backing for glass and accessories with attachment locations and a sealing method that maintains waterproofing continuity.
- Ventilation, building-envelope interface: assign duct support, opening treatment and exterior termination sealing so neither the ventilation nor exterior-work scope leaves a gap.
11. Design for Serviceability and Buy Compatible Components
Choose fixtures as serviceable assemblies, not isolated decorative purchases. Seals, cartridges and controls may need replacement long before the visible fixture wears out. Before ordering, establish three things: the product can be identified precisely, its working parts have a credible supply route, and the finished room will allow the required service access.
Evaluate support using the exact model number, finish suffix and revision where applicable, not merely a collection name. Obtain installation instructions, dimensioned drawings and a parts diagram. Check whether cartridges, seals, drain mechanisms and proprietary mounting pieces have individual order numbers. Ask a supplier to confirm current availability and whether common service parts are sold separately or only within larger assemblies. Downloadable documentation and an identifiable parts distributor are more useful evidence than a general promise of support. Neither a warranty nor a listed part number guarantees future availability.
Discontinued fixtures deserve particular scrutiny. A lower purchase cost may come with limited trim choices, fewer compatible replacements or dependence on remaining stock. Determine whether service parts are shared with an active product line using manufacturer documentation, not visual similarity. If essential parts are already difficult to obtain, the purchase transfers that uncertainty into the finished bathroom.
Have the plumber and designer map service routes for concealed valves, toilet tank mechanisms and carriers, pumps, and connections that require access under the product instructions or applicable requirements. Distinguish routine servicing from major replacement: a shower trim opening may permit cartridge replacement without permitting valve-body removal, while a flush-actuator opening may serve tank mechanisms but not the carrier. Do not assume every concealed connection requires a panel, or that one small opening makes an entire assembly serviceable.
For each required opening, check clear dimensions, working space, fastener access and the route for removing the largest serviceable component. Evaluate these with drawers, doors and adjacent fixtures in their finished positions. Removable cabinetry sections should be designed for removal without destroying the cabinet or countertop. Keep access closures reachable and avoid finishes that permanently bridge them. Wet-area access details must remain consistent with the waterproofing design in Chapter 10.
Compatibility depends on exact combinations. Have the plumber check manufacturer pairing tables for the rough-in body, trim, cartridge, diverter components, adapters and mounting hardware. The same brand or collection can contain incompatible generations. Confirm which components are included in each package; a trim kit may omit the cartridge or rough-in body. Where an extension kit is needed, verify its approved models and dimensional range against the planned finished assembly. It cannot correct an unrelated valve or an unsupported installation depth.
Compare visible materials by component rather than by a single label such as 'brass construction.' Bodies, handles, spray housings and decorative covers may use different materials. Consider susceptibility to scratching, chipping or denting, and whether a damaged visible piece can be replaced separately. For plated, coated and living finishes, consult product-specific guidance on ordinary splashes, dampness, soap residues and toiletries. Check cleaning limitations against products the household actually uses. A living finish intentionally changes appearance; a premium finish name does not establish greater durability. Compare samples when matching matters, since identical finish names do not ensure identical color or sheen.
Assign procurement tasks before purchase. With owner-supplied fixtures, the owner generally remains the seller's customer for returns and damage claims unless another arrangement is agreed. Contractor supply can consolidate those tasks, but the contract still needs to identify who checks orders, reports shortages and obtains replacements. Allocate return freight, restocking charges, expedited shipping and storage responsibility, including when a supplied product proves unsuitable. Address labor coverage and return visits in the proposal review in Chapter 12.
- Before ordering: check the complete assembly list against manufacturer documentation, including separately sold rough-ins, trim, cartridges, drains, mounting kits and access components. Resolve compatibility before committing to nonreturnable items.
- Before relying on delivery dates: distinguish stock availability, estimated shipment and expected arrival. Check every dependent component; available trim does not make a backordered rough-in ready for installation. Record cancellation terms, return deadlines and damage-reporting requirements.
- At delivery: assign prompt inspection of labels, finish, visible damage and package contents against the order and packing list. Retain packaging as required for claims, document discrepancies and separate questionable items from approved installation stock. The plumber should verify technical suitability before installation.
- Before substitution: obtain written approval identifying the exact replacement and its effects on connected components, service access, appearance, cost and delivery. A substitute that fits the visible space may still require a different concealed body or mounting system; do not release it for installation until those dependencies are resolved.
12. Compare Proposals on Scope Rather Than Bottom-Line Price
Compare proposals against one defined bathroom, not against one another’s totals alone. A lower offer may reflect efficiency, a smaller fixture package or work left for someone else. Build a task-by-task comparison before choosing a contractor. Classify each item as included, allowance, alternate, excluded or unresolved; an empty line is not evidence of inclusion.
Give every bidder the same dated layout, fixture schedule and scope notes. The layout should distinguish retained and relocated fixtures and identify relevant finished-surface references. The schedule should list quantities, selected models, required rough-in components and accessories, and who supplies them; mark undecided selections explicitly. Scope notes should identify connection boundaries, retained systems and affected surfaces. Distribute any bid-stage revisions to all bidders. Use the component decisions from Chapter 11 rather than asking each bidder to invent a different package.
Require identifiable coverage for demolition, rough-in, fixture installation, professional testing, disposal and finish restoration, even when the offer uses one lump-sum price. Demolition coverage should define removal limits and protection of retained finishes. Rough-in coverage should identify included supply, drain and vent work and connection points. Installation should cover the scheduled fixtures and accessories. Testing should be included as a deliverable; Chapter 15 addresses acceptance. Disposal should cover both demolition debris and installation packaging.
Access and restoration are separate costs. An offer may include opening a wall but exclude substrate repair, waterproofing, tile, drywall or painting. Identify those gaps and whether they require separate contracts. At trade interfaces, the proposal should specify the endpoint of the bidder’s work, not merely say 'by others.' Also identify coverage for approval-related fees and administration without assuming which approvals apply. Chapter 13 addresses approval responsibilities and sequencing.
Read pricing categories literally. An allowance is a provisional amount: determine whether it covers products only or also tax, freight, accessories and installation, and whether reconciliation includes a markup or credits for lower actual costs. Selected-product pricing should identify the exact package and any limits on price validity. An alternate must state its addition or deduction from the base offer and include consequential work, such as changed connections or restoration. An exclusion contributes nothing toward completing that task; it needs a separate budget entry if the bathroom still requires it.
Normalize concealed-condition assumptions for comparison. If one bidder assumes existing connections can remain and another includes replacement, request a common base scope or a separately priced alternate where feasible. Compare the boundaries of included replacement, not just phrases such as 'repair as needed.' For work that cannot yet be priced, evaluate the proposed charging method: fixed quotation, defined unit rates or time and materials, including markups and supporting records. Confirm that the contract identifies who may authorize additions and how approval occurs; Chapter 14 covers the discovery and change-order process.
Separate labor coverage from manufacturer warranties. Compare the labor coverage period, its starting event, exclusions and claim contact. Determine who pays for diagnosis, removal, shipping, reinstallation and access restoration when a product fails; replacement-part coverage does not necessarily pay those expenses. For owner-supplied products, compare any installation-coverage limitations and charges for additional trips. Distinguish callbacks for installation deficiencies from visits caused by defective products, owner changes or delays outside the contractor’s scope. Use Chapter 11’s procurement responsibilities rather than reopening the purchasing checklist.
Verify the legal contracting entity and relevant active license through the official licensing authority, including whether the credential covers the proposed work. Ask who will perform subcontracted work. Request current insurance evidence and confirm relevant coverage with the issuing agent or insurer, including workers’ compensation coverage or any applicable exemption. Seek references for comparable project scope, especially relocation or work in occupied homes when relevant. Ask about unexpected charges, completion of excluded work and callback response, not just whether the finished room looked good.
- Compare the anticipated owner commitment: base offer, chosen alternates, necessary excluded work, allowance adjustments and separately contracted services. Keep the uncertainty reserve established in Chapter 1 distinct from the contractor’s price; do not count the same cost twice.
- Check commercial terms alongside scope: payment milestones, deposit treatment, proposal expiration and conditions that permit repricing. A payment tied to identifiable completed work is easier to evaluate than an undefined progress payment.
- Identify delay-related charges: storage, additional mobilization, missed delivery or return trips. Ask which events trigger them and how the charge is determined.
- Evaluate communication through the bidding process itself. Does the bidder answer specific questions, identify omissions and revise inconsistent scope descriptions? Clear, bounded commitments are more useful than an unsupported assurance that everything is covered.
13. Establish Approvals, Responsibilities and the Work Sequence
Schedule the remodel around dependencies, not just a demolition date and a target finish. Ask the lead contractor to distinguish working days from elapsed time for review, inspections, fabrication and curing. The useful schedule identifies what releases each stage, which activities can overlap and which delay would extend bathroom downtime.
First establish the property's actual jurisdiction. A Freeport mailing address does not establish the state, municipal boundary or permitting authority. Using the property address and parcel information, have the contractor verify jurisdiction through official sources and confirm which office handles the proposed scope. Describe plumbing relocations and associated structural or electrical work, not simply a “bathroom update.” Municipal and county responsibilities are not interchangeable; where more than one office is involved, determine which approvals depend on others. Confirm the submissions, inspections and authorization needed before the affected work starts.
Assign an approval coordinator and identify the responsible applicant for each required approval. The team needs named responsibility for preparing submissions, answering review comments, obtaining approvals, booking inspections and providing inspector access. Also identify who retains the official results and gives the owner copies. An inspection booking is a schedule event, not permission to advance: the coordinator must account for the outcome before releasing dependent work.
Before demolition, settle the layout, fixture selections and dimensions that control rough-in, along with the finish assembly references established in the design. Use Chapter 11's procurement checks rather than repeating them here. For scheduling, distinguish materials needed immediately from those needed later. Components that establish concealed positions should be available and checked before their installation stage; later finish items need confirmed delivery dates that precede their scheduled use. A shipping estimate alone is a weak basis for removing the household's only usable bathroom.
The sequence normally begins with required authorization, site protection and professional utility isolation, followed by controlled demolition. Allow a review point after exposure before committing the next trades to work that depends on concealed conditions; Chapter 14 addresses discoveries and changes. Necessary framing work and plumbing and electrical rough-ins then proceed in a coordinated order. Routes and supports must be resolved before competing trades occupy the same spaces. Reserve the applicable inspection and testing windows before wall or floor closure rather than trying to fit them around an already-booked finish crew.
Next, schedule substrate preparation, waterproofing and its required verification before finishes obscure the assembly. The contractor should use the selected system's installation and curing requirements when setting tile dates, not a generic allowance. Cabinetry, countertops and finish plumbing have separate dependencies: some cabinets follow flooring, countertop templating may require installed cabinets, and final sink and faucet connections may await countertop installation. Confirm the actual order for the selected assemblies. Enclosure measurement or fabrication may also depend on completed tile. Physical installation, curing and readiness for use are different milestones.
Plan loss of the bathroom separately from interruptions to water elsewhere. Ask the plumber which connections require a broader shutdown, whether the other bathroom shares affected services and when those services are expected to return. Set a notice method and a contact for delayed restoration. Another bathroom counts as a workable alternative only if it remains functional and occupants can reach it without entering the work area. If that cannot be maintained, arrange accommodation before demolition rather than relying on improvised temporary facilities.
For seasonal occupancy or rentals, work backward from the intended return or guest-arrival date without treating it as evidence that construction can finish in time. An absent owner needs an available decision-maker, access arrangements and agreed response windows. Keep a completion buffer tied to actual uncertainties, approval timing, inspection availability, fabrication, replacement deliveries and curing, not an arbitrary universal number of days. Separate the contractor's target completion from the date the household can safely commit to occupancy; use Chapter 15's completion checks to establish readiness.
- Before booking demolition: Are the required approvals in place, controlling design decisions settled and early-stage materials available?
- Before confirming trade dates: Which predecessor tasks must be complete, who releases the handoff and how much notice does the next trade require?
- Before accepting downtime: Is the alternate bathroom usable through each planned shutdown, and what is the fallback if water restoration is delayed?
- Before committing to a return or reservation: Does the schedule include remaining fabrication, curing, inspections and completion checks, not merely the last installation day?
14. Manage Construction Discoveries and Design Changes
A construction discovery should trigger a bounded decision, not an automatic expansion of the remodel. When exposed piping, framing or substrate conflicts with the planned installation, the contractor should identify the affected work and pause tasks that would conceal the condition or commit the project to a solution. Unrelated work can continue only if it preserves access and leaves the alternatives genuinely available. Use the existing-condition record from Chapter 2 to identify which design assumption has changed rather than restarting the entire assessment.
First determine whether the discovery requires correction for the approved design to proceed, makes that design impractical, or merely creates an opportunity for an optional improvement. Ask what happens if the team retains the original layout, modifies only the affected detail, or adopts a broader redesign. Compare lost usable space, finish removal, restoration boundaries and changes to the bathroom’s agreed function, not just the added plumbing charge. A smaller immediate repair is not necessarily the least disruptive option if it leaves adjacent work needing removal later, but that possibility needs professional support rather than speculation.
Where the extent remains unknown, authorize a limited investigation separately from permanent repairs. Its scope should identify the question to be answered, the authorized access, the cost limit or pricing basis, and the point at which the team returns for a decision. This prevents an exploratory opening from becoming an open-ended repair authorization. Immediate professional measures needed to prevent further damage should be recorded separately; they do not establish approval for a permanent redesign.
Reopen design coordination when a proposed response changes another discipline’s work or an approved user outcome. Revised fixture positions may affect reach or circulation; a changed drain or floor elevation may affect the waterproofing assembly; altered framing or equipment may require structural or electrical input. The designer and affected licensed professionals should resolve these interfaces before the change is released. The permit contact established in Chapter 13 should determine with the applicable authority whether revised submissions or review are needed. Owner consent does not replace that determination.
At the next agreed homeowner checkpoint, compare the changed detail with the approved layout and finish references. The contractor can provide safe access, marked photographs or a remote walkthrough. Ask to see the expected finished wall or floor plane alongside fixture centerlines and control locations so bare framing does not create a misleading impression. Record whether the homeowner accepts the preference-related change or flags a discrepancy; this review is not technical approval or permission to enter restricted work areas or test unfinished equipment.
Before a changed assembly is concealed, the contractor should update the rough-in record at that location. Capture an orientation photograph and close views of the revised route or connection, dimensions from identifiable fixed references, and whether those references represent framing or finished surfaces. Include the installed concealed component’s model identifier and identify which drawing detail it supersedes. Keep this targeted record with the project documents described in Chapter 16; photographs do not establish that an assembly is ready for enclosure.
For disputed details, mark the exact location and identify whether the disagreement concerns the contracted scope, design intent, workmanship or an owner-requested revision. Assign a decision-maker and response date, and leave the affected assembly accessible pending resolution. If a component is delayed, compare waiting with a substitute’s total consequences, including redesign, finish changes, return visits and rework, not delivery date alone. Use Chapter 11’s compatibility review rather than accepting a product solely because it is available. Neither schedule pressure nor silence authorizes substitution.
- Change-order trigger: Identify the discovered condition or owner request, its location, and the drawing, selection or assumption it changes. Attach only the photographs or marked details needed to define it.
- Defined response: Describe the correction or revision, affected products and restoration, exclusions, and what remains unchanged. Identify any unresolved dependency that prevents a final commitment.
- Cost basis: Separate additions from credits for omitted work and show allowance adjustments where relevant. State whether pricing is fixed or based on documented labor and materials; for uncertain work, establish an authorization limit and the next decision point.
- Schedule effect: Identify procurement, redesign and review dependencies, the effect on bathroom availability, and which dates remain estimates. Include any added mobilization or return visits in both the schedule and cost discussion.
- Release and distribution: Obtain authorization from the parties designated by the contract before affected work proceeds. Issue the revised detail to every affected trade, mark the superseded version, and identify any change-specific condition that must be resolved before enclosure.
15. Verify the Finished Bathroom Before Project Closeout
Use the closeout walkthrough to compare the completed bathroom with the approved fixture schedule, performance criteria and authorized changes. Schedule it when installation is complete and finishes have cured sufficiently for the planned demonstrations. This is an acceptance check, not a redesign session. Have the contractor identify any fixture that is not ready for use before demonstrations begin.
Mark each checklist item pass, fail or deferred. Pass means the applicable evidence or demonstration meets the agreed criterion. Fail means a defect or unmet requirement needs correction. Deferred means verification remains outstanding; record the reason and what must happen before it can be completed. Do not count an untested feature as passing because it looks finished.
Required inspection approval and satisfactory fixture operation are separate acceptance checks. Review the project-specific test and inspection outcomes already established under Chapter 13, including closure of deficiencies. Use the checklist below for finished-room performance; retain the broader product and maintenance records through the handoff in Chapter 16.
- Professional verification , Pass when applicable plumbing leak or pressure tests, drainage checks and waterproofing tests have documented satisfactory outcomes identifying the tested work, date and responsible professional. Earlier-stage waterproofing evidence should be available even though the assembly is now concealed. A previously failed item needs its correction and required retest outcome. Missing evidence is deferred, not proof of failure or success.
- Required approvals , Confirm that required final inspections have satisfactory outcomes and that outstanding conditions affecting completion are resolved. An inspection still awaiting scheduling remains deferred. Do not substitute a contractor walkthrough for an authority’s required approval.
- Faucets and shower controls , Have the contractor demonstrate flow adjustment, shutoff and every specified outlet selection, including approved combinations. Compare operation with the selected equipment’s intended functions rather than assuming every outlet should run together. The licensed plumber should verify temperature-protection settings and operation; markings alone are not evidence, and skin contact is not a safe temperature-limit test.
- Tub and toilet functions , Observe the tub stopper holding water, its release and normal emptying. Confirm professional verification of the waste-and-overflow connection without deliberately overfilling the tub. Watch each specified toilet flush option, refill and return to rest. Include any bidet function using the manufacturer’s demonstration procedure. Continuing refill, a leaking stopper or a missing specified function fails this check.
- Splash, drainage and stability , During ordinary handwashing, note whether the stream stays usefully within the basin and whether splash reaches the counter or floor. Observe sink and tub drainage for sustained backup or leakage. Notice fixture movement during normal use; do not deliberately rock fixtures or load support fittings. Secure installation of grab bars and other support fittings requires professional confirmation.
- Shower containment and remaining water , After the contractor runs the shower, note water escaping the intended enclosure and water remaining after flow stops. Record the location, extent and elapsed time for persistent puddles. Clinging droplets or a thin surface film differ from standing water in a depression. Unexplained persistent pooling or exterior wetting needs assessment before this item passes; it does not by itself identify the underlying defect.
- Agreed simultaneous use , Have the contractor run the previously approved fixture-use sequence. Compare outlet operation, noticeable spray changes and temperature stability with the agreed expectations. The plumber handles measurements and adjustments. Record which fixtures operated and any unmet criterion. A brief successful demonstration confirms that sequence under current conditions, not unlimited hot-water duration or performance at every possible household demand.
- Punch-list classification , Separate cosmetic defects, such as scratched trim, from incomplete functions, such as an unavailable shower mode. Flag active leakage, sewage backup, unexpectedly scalding water or movement of a fixture intended to support a person as stop-use conditions requiring prompt professional assessment. Stop using the affected fixture rather than continuing the demonstration.
- Correction and acceptance , For each failed or deferred item, record the responsible party, corrective action or missing verification, return date and acceptance check. Include responsibility for restoring finishes disturbed by corrections and any necessary retesting. State whether the affected fixture may remain in use. Review final acceptance and payment under the contract; a promised return visit is not a completed correction. Close items after verification and identify any remaining exceptions expressly.
16. Build a Maintenance Record and Ownership Handoff
Keep a permanent bathroom file for service and a separate, brief operating sheet for occupants. Carry forward the component schedule and access information from Chapter 11, the concealed-work photographs from Chapter 14 and the completion records from Chapter 15 rather than creating competing inventories. Store a backed-up digital copy where another responsible person can retrieve it.
Organize the file by fixture or assembly. Preserve identifiers for both visible trim and concealed equipment; the name on a shower handle may not identify the valve behind it. Attach installation dates, manuals, finish-care instructions, purchase records, warranty terms and contractor contacts to the relevant entry. Add dated service notes describing the symptom, professional findings and any replacement component. Retain the original record so later service providers can distinguish installed equipment from subsequent substitutions.
Build the cleaning sheet around the exact materials and manufacturer instructions. A cleaner permitted on a ceramic basin may damage the adjacent faucet finish, stone or sealant. Specify permitted products, tools and any required dilution, contact time and rinsing. Where instructions for adjoining materials conflict, obtain a compatible method from the manufacturers rather than choosing a stronger cleaner. Keep product labels available to cleaners; a generic instruction such as “use bathroom cleaner” is not enough.
For shower outlets, follow the stated method for wiping the exterior and flexible spray nozzles. Do not assume acidic soaking is safe for every finish. Use the specified cloth and cleaner on faucets; persistent uneven flow after permitted external cleaning calls for service, not internal disassembly. Tub-system instructions must distinguish ordinary surface care from manufacturer-prescribed cleaning or drying cycles. Jetted and air-bath systems are not interchangeable. Remove surface hair and residue from accessible drain covers only as instructed, without loosening drain flanges or disturbing seals. Do not use drain chemicals.
Use the completed bathroom’s demonstrated performance as the reference for later reports, not as a reason to repeat commissioning tests. Note the fixture, date, duration and change from normal operation. Relevant changes include slower drainage, reduced spray, delayed hot-water arrival, unexpected temperature swings, new gurgling or recurring toilet refilling. Mention other fixtures already in ordinary use when the symptom occurred. These details help a licensed plumber investigate without requiring occupants to diagnose the cause.
Photograph new accessible dampness, stains, swollen cabinetry or fixture movement. Report recurring sewage odors and water outside the normal wet area as well. Do not operate a fixture again merely to reproduce a suspected leak. Active leakage, sewage backup or unsafe temperature behavior calls for stopping use of the affected equipment and seeking prompt professional assistance; sewage cleanup also belongs to professionals.
Choose a visual-review interval based on occupancy and product instructions, with a review after an extended vacancy or reported problem. From normal accessible positions, look for separated sealant edges, cracks at fixture junctions, discoloration and persistent moisture. Compare dated photographs where a change is uncertain. Intact-looking sealant does not establish that concealed waterproofing is sound, and covering recurring dampness with fresh sealant can conceal an unresolved problem. Refer deterioration for professional evaluation and repair.
During that review, confirm that the existing service locations remain visible and reachable. Do not remove screwed panels or reach into equipment spaces. The maintenance task is to prevent storage, shelving or later decoration from obstructing the access already planned in Chapter 11, not to redesign it.
For rental or seasonal occupancy, assign one person to receive reports, arrange service and tell the next occupant whether an affected fixture remains out of use. Give guests only the operating essentials; provide cleaners and managers with the additional care instructions below. At sale or renovation, transfer the permanent file and walk through the recorded access locations. Concealed-work photographs are reference material, not clearance maps for drilling or cutting. Future contractors must verify conditions before alteration and preserve service access. Update the file whenever equipment or access arrangements change.
- Guests: identify controls, include applicable tub-system operating precautions, and give one reporting contact for leaks, odors, drainage changes or temperature problems.
- Cleaners: list permitted products and tools by surface, include prescribed tub cleaning cycles, and prohibit chemical substitutions, drain chemicals and adjustment of unfamiliar components.
- Managers: record when a problem was reported, which fixture is affected, whether use has stopped, who is arranging professional service and when the occupant will receive an update.
About this guide: This resource provides general homeowner education, not a remote diagnosis. Actual conditions, code requirements, equipment, and safe repair options must be evaluated at the property.